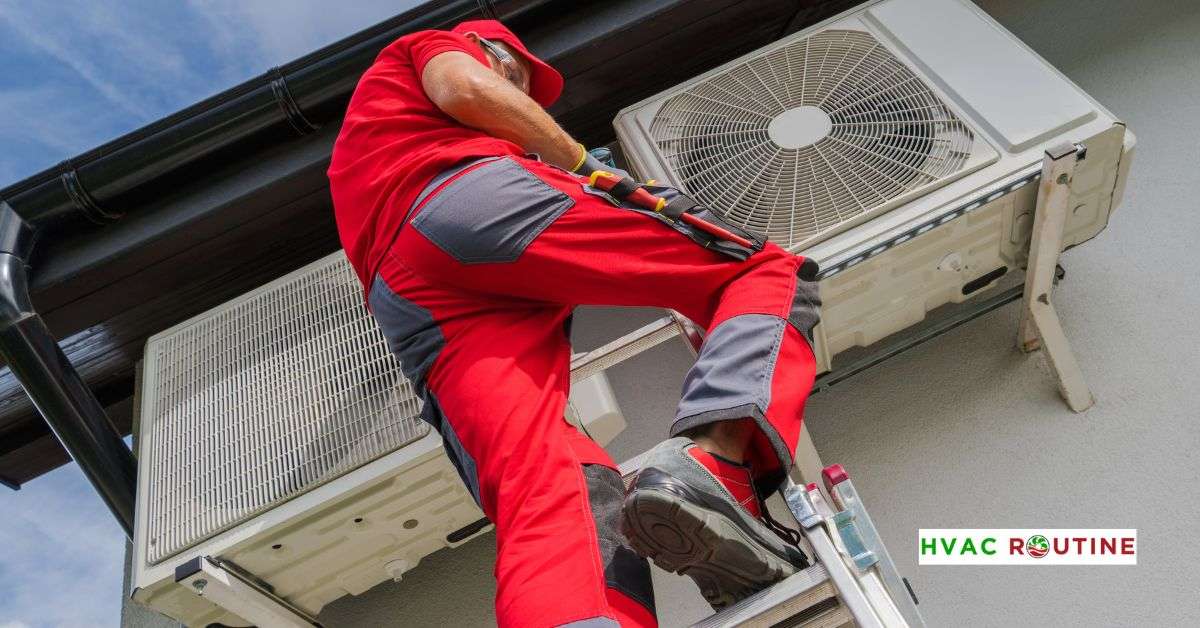
You set your thermostat on a hot afternoon, walk by a vent waiting for a wave of cool relief, and hear your outdoor unit kick on with a steady hum. But before the room cools down even half a degree, the outdoor unit clicks, drops into silence, and leaves you sweating in frustration. If you are standing outside wondering Why does my AC compressor shut off after 2-3 minutes, take a deep breath before panicking about buying a brand-new five-thousand-dollar system.
A sudden shutdown after 120 to 180 seconds almost always means an internal safety switch stepped in to protect your system from catastrophic damage. These sensors cut high-voltage power the instant they detect dangerous heat levels, blocked airflow, or sharp pressure spikes. In most cases out in the field, this issue traces back to an inexpensive fix like a worn-out run capacitor, a suffocated air filter, or an overlooked safety switch on your indoor drain pan.
Before grabbing a screwdriver to pull off access panels, stand beside your outdoor unit during a startup cycle. The specific noises and behaviors your system shows right before shutting down reveal nearly everything you need to know.
| Sound Right Before Shutdown | Outdoor Fan Status | Likely Culprit | Repair Difficulty |
| Sharp metallic “click” | Fan keeps spinning | Thermal overload switch tripping from heat | Intermediate DIY / Pro |
| Loud, heavy buzzing or groaning | Fan keeps spinning | Swollen run capacitor or seized motor rotor | Easy DIY / Pro |
| Complete, silent power drop | Fan and compressor die together | Tripped condensate float switch or thermostat reset | Easy DIY |
| High-pitched hiss or pressure rush | Fan keeps spinning | Internal high-pressure bypass valve popping open | Pro Only |
| Loud breaker snap | Entire electrical circuit dies | Grounded motor windings pulling locked rotor amps | Pro Only |
What You'll Learn ⭐⭐⭐⭐⭐
- The 30-Second Triage: Outdoor Fan Running vs. Total Silence
- Scenario A: The Fan Keeps Blowing Air While the Compressor Stops
- Scenario B: Both the Fan and Compressor Shut Down Together
- Why Does My AC Compressor Shut Off After 2-3 Minutes?
- The Sneaky Indoor Culprit: Clogged Drain Lines and Float Switches
- The Hidden Red Manual Reset Button on the Condenser
- Is Your AC Brand New? The Problem of System Oversizing
- Four Common Electrical Faults Behind Short Cycling
- Failing Dual Run Capacitor
- Normal vs. Blown Run Capacitor
- Pitted or Burned Contactor Points
- Compressor Locked Rotor Amps (LRA)
- Failing Control Boards and Defrost Relays
- Brand-Specific Diagnostic LED Flash Codes
- Dirty Coils and Airflow Choking
- Airflow vs. Head Pressure Impact
- Clogged Outdoor Fins Trapping High Head Pressure
- Clogged Indoor Filters Starving the Evaporator
- Dying Condenser Fan Motor
- Refrigerant Problems: Leaks, Overcharging, and Stuck TXVs
- Why You Must Stop Running It: The Acid Burnout Warning
- The Compressor Acid Burnout Cascade
- HVAC Short Cycling Troubleshooting: A Safe Step-by-Step Fix
- Step 1: Perform a Hard Electrical Reset
- Step 2: Clear the Condensate Drain Line and Float Switch
- Step 3: Inspect and Replace the Air Filter
- Step 4: Wash the Outdoor Condenser Coils
- Step 5: Test and Inspect the Dual Run Capacitor
- Can a Hard Start Kit Save an Aging Compressor?
- Standard Run Circuit vs. Hard Start Kit Addition
- Repair Costs vs. System Replacement ($5,000 Rule)
- When to Call a Pro (and How to Avoid Getting Upsold)
The 30-Second Triage: Outdoor Fan Running vs. Total Silence
A simple rule of thumb can cut your diagnostic time right down the middle: look straight through the top wire grille at the outdoor fan blades when the compressor cuts off.
Scenario A: The Fan Keeps Blowing Air While the Compressor Stops
If the top fan continues to blow warm air out of the cabinet while the compressor cuts out with a muted click, your 24-volt control system is working as intended. Your thermostat is still calling for cooling, and the magnetic contactor switch remains pulled closed.
This symptom isolates the failure directly to the high-voltage compressor circuit. You are almost certainly dealing with a failing run capacitor, burned contactor terminals, or an overheating motor that tripped its internal thermal safety disc.
Scenario B: Both the Fan and Compressor Shut Down Together
When the outdoor unit goes entirely dead all at once, the issue rarely originates inside the compressor pump itself. Instead, an upstream safety switch has killed the low-voltage circuit that holds the contactor closed.
Nine times out of ten, this simultaneous shutdown happens because water is backing up in your indoor condensate drain pan, an extreme pressure switch tripped on the copper line, or a smart thermostat lost its continuous 24-volt feed and rebooted.
Why Does My AC Compressor Shut Off After 2-3 Minutes?
Central air conditioners and heat pumps rely on built-in protective controls to keep electric motors from burning themselves into scrap metal. Whenever an electric motor faces high electrical resistance or mechanical friction, its internal copper windings heat up rapidly.
Directly on the compressor housing sits a thermal overload switch, often called a Klixon switch. Inside this small round component is a calibrated bimetallic disc. When the compressor housing reaches unsafe temperatures—often feeling hot enough to fry an egg—the two metals expand at different rates, causing the disc to snap backward and break the electrical circuit.
Compressor Starts
Unit receives line voltage and begins cooling cycle
High Resistance / Heat Build-up
Amperage spikes or trapped heat raises internal temperature
Bimetallic Disc Warms to Threshold
Thermal overload protection heats up across 120–180 seconds
Switch Snaps Open
Bimetallic strip flexes and breaks the circuit
Compressor Cuts Out Silently
Emergency shutdown saves motor from burnout
This heating process takes between two and three minutes of continuous running. Once the disc snaps open, the compressor stays quiet until the thick metal housing sheds its heat and the disc snaps shut again, which can take anywhere from thirty minutes to two hours. Running your system in this loop creates severe AC compressor short cycling that rapidly degrades motor bearings and wastes electricity.
The Sneaky Indoor Culprit: Clogged Drain Lines and Float Switches
During summer service calls, technicians often find homeowners inspecting their outdoor unit when the real culprit is sitting quietly in their attic or hallway closet.
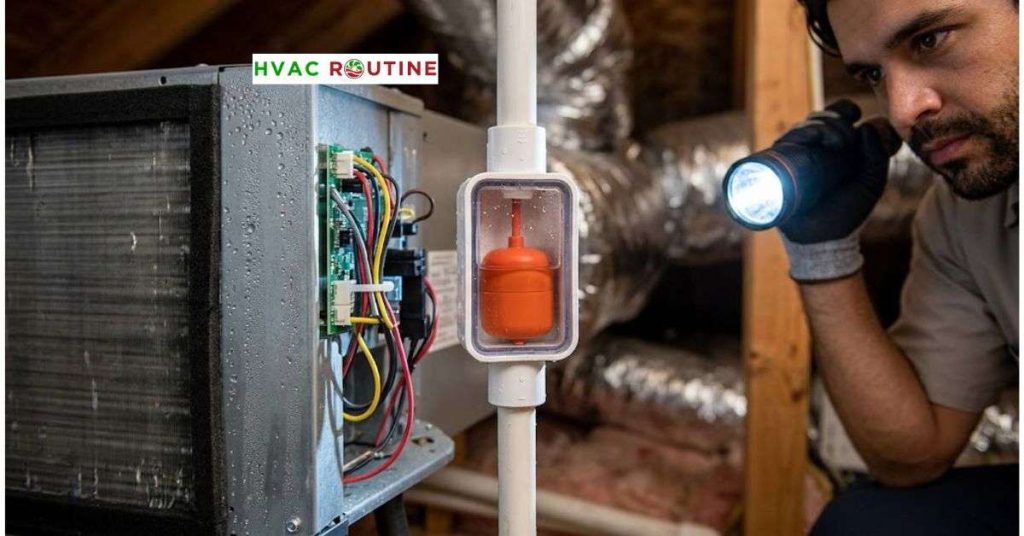
Your indoor evaporator coil wrings pints of water out of humid air every hour. That moisture drains into a shallow plastic pan and flows outside through a white PVC pipe. Over several cooling seasons, dust, microbial slime, and algae form a thick jelly inside the drain trap.
When the pipe backs up, water fills the pan and lifts a small cylindrical float switch. To prevent water from overflowing through your ceiling, this switch immediately cuts the 24-volt cooling signal. Because the pan takes a couple of minutes to collect enough fresh water to lift the switch after a reset, the system runs briefly and then shuts down without a sound.
The Hidden Red Manual Reset Button on the Condenser
Some air conditioning units, particularly commercial models and residential systems built by brands like Rheem and Ruud, come equipped with a manual high-pressure lockout switch.
This component mounts directly to the copper liquid line inside the outdoor unit, featuring a small rubber-sheathed red button that sticks out near the service valve access panel. When head pressure spikes past safe operational limits, this mechanical switch pops outward and stays open.
Unlike modern automatic switches that reset on their own once temperatures cool down, a manual switch keeps the system off indefinitely. If your compressor ran briefly after a long winter break and now refuses to start at all, shut off the breaker, locate this red button, and push it firmly until you feel a distinct mechanical click.
Is Your AC Brand New? The Problem of System Oversizing
If your air conditioning unit was installed recently and cuts out after two or three minutes from day one, you may not have broken parts at all. You might be dealing with an oversized system.
Proper heating and cooling design requires matching equipment tonnage to your home’s square footage, window placement, and insulation quality. When an installer drops a 4-ton unit into a house that only requires a 2.5-ton system, the massive volume of cold air drops the room temperature near the thermostat almost instantly.
The thermostat hits its setpoint and cuts the cooling cycle before the system runs long enough to dehumidify the air. This rapid satisfaction leaves your living room feeling clammy, creates hot spots across back bedrooms, and puts needless starting wear on the motor.
Four Common Electrical Faults Behind Short Cycling
Outdoor electrical components absorb brutal heat on hot summer afternoons. Check these common failure points before assuming your compressor has given up the ghost.
Failing Dual Run Capacitor
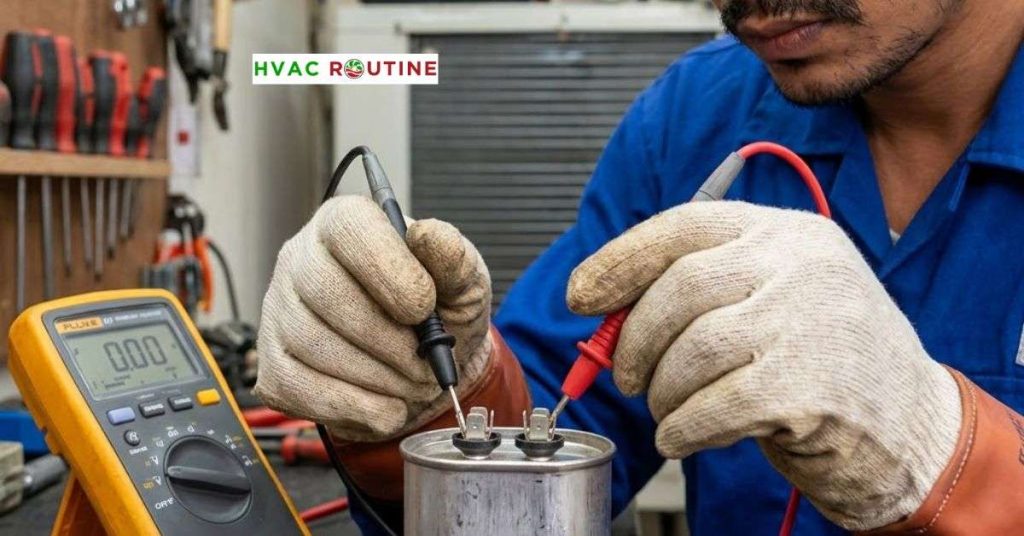
During mid-summer heatwaves, a failing capacitor is responsible for rapid shutdowns in an overwhelming number of cases. The dual run capacitor acts like a short-term battery reservoir, supplying the phase-shift voltage required to keep the compressor and fan spinning at full speed.
Intense heat cooks the dielectric fluid inside these round metal cans. When a capacitor degrades, its microfarad rating drops, causing the compressor motor to stumble, pull high amperage, and trip the thermal overload within three minutes. Inspect the capacitor top; if the metal looks domed or bulges upward like a swollen soda can, replace it right away.
Normal vs. Blown Run Capacitor
Compare your outdoor unit’s capacitor against these realistic 3D models
Flat Metal Top Plate
The top disc sits sunken and flat below the crimped rim. Terminals point straight up at 90 degrees with straight, parallel cylinder walls.
Convex / Puffed Dome
Internal gas pressure has ruptured the internal safety diaphragm, popping the metal top into a balloon curve and pushing the terminals outward.
Field Tip: Do not let a pushy salesperson convince you that your entire system is finished until they hook up a multimeter and test the capacitor right in front of you. A new capacitor costs less than forty dollars online.
Pitted or Burned Contactor Points
The contactor is an electromechanical switch that closes its metal points to send 240 volts of line power into your compressor. Every time your system turns on, a tiny electrical arc flashes across these metal points.
Over five to ten years of seasonal use, carbon deposits and rough pits coat the copper surfaces. This carbon layer creates strong electrical resistance, dropping the voltage delivered to the motor. The compressor draws extra amps to compensate for the weak voltage, heating up until the safety disc snaps.
Compressor Locked Rotor Amps (LRA)
As a compressor ages, its internal bearings and mechanical scrolls face friction from metal wear or breakages in oil circulation. When the motor tries to start against high refrigerant pressures, the rotor binds up.
The motor draws locked rotor amps, which is the highest surge current the motor can physically pull. This sudden power spike either trips the main breaker instantly or drives internal temperatures skyward within a minute or two.
Failing Control Boards and Defrost Relays
Modern central systems and heat pumps feature circuit boards with built-in time delays that prevent rapid restarts after electrical flickers. A weak relay on a defrost board can hold its connection when cold, but drop the 24-volt contactor signal as soon as internal circuit traces warm up under operational load.
Brand-Specific Diagnostic LED Flash Codes
Modern residential systems feature diagnostic LED indicator lights on their outdoor control boards. You can often see these lights through a small sight glass on the corner access panel. Count the blinking light pattern to see why the board halted operation:
- Goodman and Amana:
- 1 Flash: High-pressure switch lockout (look for choked coils or a bad fan motor).
- 2 Flashes: Low-pressure safety switch active (check for a refrigerant leak or frozen indoor coil).
- 3 Flashes: Low-voltage drop or contactor failure.
- Carrier and Bryant:
- Rapid Flash: Normal standby mode waiting for a call.
- Code 31 or 33: High-limit switch open or thermal protection active.
- Code 45: High-pressure lockout requiring a manual reset cycle.
- Lennox:
- Alternating Slow Red and Green: Normal cooling operation.
- Simultaneous Slow Red and Green: High-pressure switch tripped.
- Rapid Red with Steady Green: Low-pressure safety sensor open.
Dirty Coils and Airflow Choking
Air conditioning systems do not generate cold air; they absorb indoor heat and push it outside. When airflow drops, heat stays trapped inside the system, creating extreme internal pressures.
Airflow vs. Head Pressure Impact
How dirty exterior fins trigger the high-limit safety cutoff
Clogged Outdoor Fins Trapping High Head Pressure
Lawnmowers blow grass clippings, leaves, and pet hair into the delicate aluminum fins of the outdoor coil. This debris creates an insulating blanket that blocks airflow across the hot tubing.
Refrigerant cannot shed its heat, causing head pressures to shoot past 450 to 550 PSI on modern R-410A systems. The high-pressure cutoff switch trips immediately to prevent copper lines from rupturing.
Clogged Indoor Filters Starving the Evaporator
A neglected indoor air filter chokes the return air stream. Without warm household air passing across the indoor coil, liquid refrigerant cannot boil off into a vapor.
Unboiled liquid refrigerant flows through the suction line back into the compressor. The suction pressure drops into the floor, tripping the low-pressure cutout switch within two minutes of starting.
Dying Condenser Fan Motor
The fan motor on top of your outdoor cabinet pulls fresh air through the coil fins. If its bearings dry out, the fan blade spins slowly or stops turning entirely. Without active airflow, heat stays trapped, and the compressor housing reaches scorching temperatures in less than three minutes.
Refrigerant Problems: Leaks, Overcharging, and Stuck TXVs
Refrigerant levels must match factory specifications down to the exact ounce to keep operating pressures balanced.
- Low Refrigerant Leaks: Refrigerant does not wear out or get used up like gasoline. A low charge points to a cracked copper flare joint or an aging Schrader service valve. When pressure drops below safe limits, the low-pressure switch cuts operation so the compressor does not run dry without oil.
- Refrigerant Overcharge: Adding more refrigerant does not make your air conditioner blow colder. When an untrained technician dumps excess gas into a system during hot weather, liquid floods the condenser coils. This excess fluid leaves no room for hot gas to condense, sending head pressure skyward and tripping the high-pressure switch within two minutes.
- Stuck Thermostatic Expansion Valve (TXV): The expansion valve meters liquid refrigerant into the indoor evaporator coil. If moisture or metal debris jams the tiny needle inside the valve shut, refrigerant flow stops. The compressor pulls the suction line into a deep vacuum, and the safety switch cuts power right away.
Why You Must Stop Running It: The Acid Burnout Warning
When a compressor repeatedly shuts down after running for two minutes, your natural reaction might be to keep flipping the breaker to squeeze out whatever cool air you can. Stop doing this immediately.
Repeated overheating breaks down the chemical structure of the refrigeration oil circulating through the pump. This burned oil mixes with trace amounts of system moisture to form hydrochloric and hydrofluoric acid.
The Compressor Acid Burnout Cascade
How repeated 2-minute short cycles turn a minor repair into total system destruction
Repeated 2-Min Overheat Cycles
The unit repeatedly restarts under thermal distress, exposing the motor to high operating temperatures.
Refrigerant Oil Cooks & Breaks Down
Extreme friction and discharge temperatures carbonize the synthetic lubricant inside the compressor shell.
Acid Forms Inside Sealed Tubing
Thermal decomposition combines with moisture to create corrosive hydrochloric and hydrofluoric acids.
Destroys Winding Insulation
Circulating acid strips the protective enamel coating directly off copper motor wires.
Motor Burnout & Short to Ground
Motor coils short against the casing, blackening line set oil and destroying the entire condensing system.
This corrosive acid eats away the enamel insulation on the motor windings until they short-circuit against the steel housing, causing a catastrophic burnout. Acid also contaminates the entire copper line set and indoor coil.
Fixing an acid burnout requires replacing the compressor, installing expensive suction-line burnout filter driers, and flushing every foot of copper tubing with specialized solvents. If any trace of acid stays behind, it will chew through your replacement compressor in short order.
HVAC Short Cycling Troubleshooting: A Safe Step-by-Step Fix
Work through these steps in order to diagnose and resolve your issue safely before spending money on a service truck fee.
Step 1: Perform a Hard Electrical Reset
Set your thermostat to “Off.” Head to your main electrical panel and flip the dual breakers for both your indoor air handler and outdoor condenser to the full “Off” position. Walk outside to the metal disconnect box next to your condenser, open the cover, and pull the disconnect block out. Wait ten full minutes to allow internal control timers and microprocessors to clear, restore all power, and set your thermostat five degrees below room temperature to see if the unit runs normally.
Step 2: Clear the Condensate Drain Line and Float Switch
Find the white PVC drain pipe running out of your indoor air handler. Pull the safety float switch out of its slip-fit tee and check for standing water in the drain pan or pipe. If water fills the pipe, head outside with a wet/dry shop vacuum, connect it to the drain exit point, and vacuum out built-up algae and sludge. Clean the small float switch with a paper towel so it slides smoothly up and down, then seat it back in place.
Step 3: Inspect and Replace the Air Filter
Slide your air filter out of the return grille or furnace cabinet and hold it up toward a light. If light cannot pass cleanly through the pleated fabric, throw it away and install a fresh filter with the airflow arrow pointing toward the blower motor. Make sure your indoor supply vents are completely open and unblocked by heavy rugs or furniture.
Step 4: Wash the Outdoor Condenser Coils
Kill electrical power at the outdoor disconnect box. Clear away overgrown grass, weeds, and garden tools within two feet of the unit. Spray a foaming, non-acidic coil cleaner across the aluminum fins. Let the cleaner lift the grime for ten minutes, then rinse the coils using a gentle spray from your garden hose. Always spray from the inside out or top down. Never use a high-pressure washer, as the intense water stream will instantly flatten the soft aluminum fins.
Step 5: Test and Inspect the Dual Run Capacitor
Turn off all power to the outdoor condensing unit and remove the metal access panel using a nut driver. Discharge the capacitor safely by placing an insulated screwdriver shaft across each pair of metal terminals. Take a photo of the wire connections, then disconnect the wires attached to the Common, Herm, and Fan terminals. Set your multimeter to capacitance (µF) and measure between Common and Herm. If the reading drops more than 5 percent below the printed rating on the side of the metal can, install a replacement.
Can a Hard Start Kit Save an Aging Compressor?
If your compressor groans loudly, stumbles during startup, and trips its thermal switch due to internal mechanical wear, a hard start kit offers a reliable, low-cost fix.
Standard Run Circuit vs. Hard Start Kit Addition
How a start capacitor and potential relay wire in parallel across existing terminals
A hard start kit pairs a high-microfarad start capacitor with a mechanical potential relay. It wires directly in parallel with your existing run capacitor. When your unit calls for cooling, the kit delivers up to a 500 percent boost in starting torque for a fraction of a second, helping the motor break free from sticky bearings and push past high head pressures.
Once the motor hits 75 percent of its running speed, the relay cuts the start capacitor out of the circuit so regular cooling continues uninterrupted. While a hard start kit will not cure shorted motor windings or leaky internal valves, it routinely adds three to five years of dependable cooling to an aging compressor that struggles to get spinning.
Repair Costs vs. System Replacement ($5,000 Rule)
Understanding local repair costs helps you make smart decisions about whether to fix your system or replace it entirely.
- Clearing a Blocked Condensate Drain: Free DIY / $100 to $200 Professional.
- Dual Run Capacitor Replacement: $20 to $40 DIY / $150 to $275 Professional.
- Hard Start Kit Installation: $25 to $50 DIY / $175 to $300 Professional.
- Contactor Switch Replacement: $25 to $45 DIY / $175 to $325 Professional.
- Condenser Fan Motor Replacement: $120 to $260 Parts / $450 to $700 Professional.
- Refrigerant Leak Repair and Gas Recharge: $350 to $1,400 Professional.
- Complete Compressor Replacement: $1,800 to $3,500+ Professional.
Experienced HVAC technicians frequently use the straightforward $5,000 Rule to help homeowners make sensible financial choices. Multiply the age of your air conditioning system in years by the formal repair estimate you received. If that number climbs past $5,000, investing that money into a new, energy-efficient system makes far more sense than patching up old equipment.
For example, spending $1,200 to repair a twelve-year-old system yields $14,400 under this formula. In that situation, replacing the unit will save you more money in the long run than paying for an expensive repair on an aging system that may break down again next summer.
When to Call a Pro (and How to Avoid Getting Upsold)
Taking on basic tasks like washing dirty coils, clearing drain lines, and changing a bulging capacitor is well within reach for most homeowners. However, sealed refrigerant lines and electrical shorts require professional safety equipment and specialized training.
Contact a certified HVAC technician right away if you encounter:
- A sharp, acrid smell of burnt copper or insulation coming from the outdoor cabinet, which points to a motor burnout.
- A circuit breaker that trips with a loud pop the instant the contactor clicks shut.
- Oily stains around copper tubing connections or frost spreading along the insulated suction line.
- A high-pitched screaming sound coming from the compressor housing.
Section 608 of the Clean Air Act requires EPA certification to purchase, handle, and recover chemical refrigerants. Professional technicians carry the manifold gauges, digital scales, and vacuum pumps needed to service sealed lines safely without venting gases into the air.
When you bring out a technician, protect yourself from aggressive upselling. If a contractor tells you your compressor is broken within five minutes of arriving, ask them to show you the amp draw readings on their clamp meter and the microfarad reading on your capacitor. A trustworthy technician will have no problem walking you through their diagnostic steps right by your outdoor unit.
Taking care of simple maintenance issues early prevents minor electrical hiccups from turning into stressful mid-summer breakdowns. Start by checking your indoor air filter, clearing your condensate drain line, and inspecting the outdoor coil for trapped dirt. If your system still shuts off after two or three minutes, testing your run capacitor or adding an inexpensive hard start kit can often get your air conditioner running smoothly again without breaking the bank.