| Project Overview | Quick Reference Specs |
| Estimated Repair Time | 30 to 45 minutes |
| Technical Difficulty | Intermediate (Requires strict high-voltage safety awareness) |
| Material Cost | $15 – $35 (DIY) vs. $150 – $350 (Professional service call) |
| Required Tools | Digital multimeter (CAT III), 1/4″ & 5/16″ nut drivers, needle-nose pliers, smartphone camera |
It never fails: your air conditioner always decides to quit on the hottest, most humid Saturday afternoon in July. Your family is sweating, the living room feels like a sauna, and your mind immediately jumps to panic over a $2,000 compressor replacement. In reality, nine times out of ten, that sudden breakdown traces back to a thirty-dollar switch known as the contactor relay.
Quick Diagnostic: Common contactor relay switch failure symptoms include an outdoor unit buzzing sound or rapid chattering, a compressor running non-stop after the thermostat clicks off, complete outdoor silence during a cooling call, pitted contact points coated in black soot, and repeatedly tripped breakers.
Before touching a single screw on that outdoor cabinet, respect the electricity running through it. Your condenser handles lethal 240-volt power that will not give you a second chance. Always shut off your thermostat, flip the dedicated double-pole breaker inside your main panel, and pull the disconnect block out of your outdoor HVAC disconnect box before removing the service door.
What You'll Learn ⭐⭐⭐⭐⭐
- What Does an AC Contactor Relay Switch Actually Do?
- How Low-Voltage Thermostats Trigger High-Voltage Power
- Single-Pole vs. Double-Pole Contactors: The Unswitched Leg Hazard
- Decoding the Wiring Terminals: Line (L1, L2) vs. Load (T1, T2)
- Common Contactor Relay Switch Failure Symptoms to Watch For
- 1. Outdoor Unit Buzzing Sound and Contactor Chattering
- 2. Welded Contactor Points Making the AC Run Non-Stop
- 3. Condenser Silence: Bad Compressor Contactor or Burnt Coil
- 4. Tripped HVAC Breakers and Blown Control Board Fuses
- 5. Burnt Contacts and Pitted Contact Points
- Hidden Mechanical and Electrical Culprits That Mimic a Bad Contactor
- Clogged Condensate Drain Lines and Tripped Float Switches
- Heat Pump Defrost Board Cycling vs. Straight AC Contactor Issues
- Dual Run Capacitor Test: Rule Out Capacitor Decay Under Load
- High Pressure Cutoff Switch and Refrigerant Safety Interlocks
- Smart Thermostat C-Wire Issues Causing Voltage Drops and Chatter
- Pests in the Points: The “Ant Bridge” Electrical Short
- Compressor Internal Thermal Overload Lockout
- Dangerous DIY Mistakes to Avoid When Inspecting a Contactor
- Why Sanding or Filing Pitted Contacts Guarantees System Burnout
- The Hidden Hazards of Manually Depressing the Armature Plunger
- How to Test an AC Contactor Using a Multimeter
- Step 1: Disconnect High Voltage at the Breaker and HVAC Disconnect Box
- Step 2: Visual Inspection and the Smartphone Photo Trick
- Step 3: Check Contactor Coil Resistance (Ohms Test)
- Step 4: Perform a Multimeter Continuity Check Across Terminals
- Step 5: Advanced Field Test: Live Voltage Drop Under Load
- Contactor Relay Diagnostic and Troubleshooting Table
- How to Select the Exact Replacement Contactor
- Reading the Spec Label: Voltage, Poles, and FLA Ratings
- Top Replacement Brands and Supply Counter Advice
- DIY Replacement vs. Calling a Licensed HVAC Professional
- Tools and Step-by-Step Replacement Workflow
- When to Call a Licensed HVAC Technician
- Expected Contactor Lifespan and Replacement Costs
- Preventing Premature Contactor Wear and Arcing
- Upgrading to Fully Enclosed Contactors
- Keeping Outdoor Coils Clean to Lower System Amp Draw
- Common Homeowner Troubleshooting Questions Answered
- Can a faulty contactor damage my AC compressor?
- Why does my outdoor contactor make a loud clicking noise every few minutes?
- Can I spray electrical contact cleaner on my AC contactor while it is running?
- Is it normal for an AC contactor to feel warm to the touch?
- Will installing a universal aftermarket contactor void my AC warranty?
What Does an AC Contactor Relay Switch Actually Do?
How Low-Voltage Thermostats Trigger High-Voltage Power
Think of your contactor relay as an automated, heavy-duty electrical bouncer. Your indoor wall thermostat runs on a gentle 24V control voltage supplied by the transformer inside your furnace or air handler. That tiny 24-volt line does not carry enough punch to turn over a heavy compressor, so it uses an electromagnetic coil to flip the heavy switch for it.
The low-voltage wiring uses a standard color pattern you can trace with your eyes. The yellow wire (labeled Y) carries the 24-volt cooling command from your thermostat directly to one side of the contactor coil. The blue or brown wire (labeled C for common) connects to the other side to complete the electrical circuit back to ground.
When your house warms up, that 24-volt signal energizes the coil, turning it into a powerful magnet. This magnet pulls down a spring-loaded metal plunger with a reassuring, metallic “clunk,” routing 240V line voltage straight into the compressor and fan motor. When the room reaches the set temperature, the thermostat breaks the yellow circuit, the magnet drops out, and heavy return springs pull the contacts apart to cut the power.
Single-Pole vs. Double-Pole Contactors: The Unswitched Leg Hazard
Most residential air conditioners leave the factory fitted with a single-pole contactor to keep manufacturing costs low. In a single-pole switch, only one 120-volt leg gets broken when the system turns off. The second 120-volt line runs continuously across a solid brass bypass bar directly into the condenser components.
I have seen green technicians take a nasty 120-volt bite because they forgot that on a single-pole contactor, one side stays energized twenty-four hours a day. That permanent connection feeds continuous power to the compressor crankcase heater, keeping the refrigeration oil warm during cool nights. Even when the entire unit sits stone-dead and quiet, touching that brass bar while grounded will shock you unless that outdoor disconnect handle is in your pocket.
Double-pole contactors provide a much safer alternative. They feature two separate moving contact arms that physically disconnect both 120-volt legs simultaneously. Whenever I swap out a bad switch on a customer’s home, I almost always upgrade them to a double-pole model for that extra layer of safety.
Decoding the Wiring Terminals: Line (L1, L2) vs. Load (T1, T2)
Looking at a replacement switch fresh out of the box can feel confusing until you understand the markings stamped on the plastic casing. The terminals stamped L1 and L2 stand for “Line” and receive the raw, incoming 240-volt power coming straight from your outdoor pull-box.
The terminals labeled T1 and T2 stand for “Load” (often referenced as Terminals). These lugs deliver that high voltage down to your run capacitor, the outdoor fan motor, and the heavy pins of the compressor. The two small slip-on male spade tabs on the sides connect exclusively to your thin 24V thermostat control wires.

Common Contactor Relay Switch Failure Symptoms to Watch For
1. Outdoor Unit Buzzing Sound and Contactor Chattering
In my years on service trucks, that distinct, harsh buzzing sound coming from behind the patio bushes is something I can hear before I even shut off my engine. Homeowners often describe it as an angry hornet trapped inside a metal bucket. Instead of closing with that clean, solid metallic clunk, a chattering contactor rapidly hammers against its steel frame dozens of times per second.
This machine-gun rattle happens when your low-voltage supply dips below 18 volts, or when fine road dust coats the magnetic core faces. That violent vibration creates constant miniature electrical arcs across the contacts. If you hear this distinctive rattle, sprint to your thermostat and shut the system off immediately before those rapid voltage spikes wreck your compressor motor windings.
2. Welded Contactor Points Making the AC Run Non-Stop
Every single time those metal contact pads slap together under load, miniature lightning bolts flash across the tiny gap. Over several seasons of heavy summer use, arc temperatures exceeding 3,000 degrees Fahrenheit melt the silver alloy plating, creating welded contactor points. The spring tries to pull the pads apart when the cooling cycle ends, but the molten metal has effectively fused them into a permanent connection.
Your indoor blower motor will shut down as normal, but outside, the condenser fan and compressor keep pounding away day and night. Without warm indoor air flowing over the indoor coil, your suction line will freeze into a solid white block of ice stretching all the way back to the compressor. If left running, that ice block will dump liquid refrigerant straight into the compressor pump, snapping internal valves and destroying the entire unit.
3. Condenser Silence: Bad Compressor Contactor or Burnt Coil
You come home from work, the house is eighty-four degrees, and the vents are feebly blowing room-temperature air. You walk outside to the condenser, and the unit is completely silent without a murmur or a hum. When internal coil windings snap from age or a lightning surge, the magnet dies, leaving the heavy electrical switch resting wide open.
Heavy surface oxidation and burnt contacts will produce that exact same eerie silence. Even when the 24-volt coil pulls the plunger down with a mechanical snap, thick layers of non-conductive black carbon keep the high voltage from bridging across the gap. High-voltage power stops dead at the line lugs, leaving the fan motor and compressor completely lifeless.
4. Tripped HVAC Breakers and Blown Control Board Fuses
A dying contactor can cause headaches on both your high-voltage and low-voltage circuits. When the hair-thin copper wire inside that 24V magnetic coil overheats and shorts out, it pulls excessive current straight from your indoor transformer. That sudden electrical spike instantly blows the little purple 3-amp or orange 5-amp automotive blade fuse mounted on your furnace control board.
If the high-voltage pads develop carbon tracks across the plastic divider, high voltage will jump directly to ground, tripping your main 30-amp or 40-amp double-pole breaker. Never make the mistake of repeatedly resetting an AC breaker that trips the second the unit kicks on. Forcing that breaker back on can turn a simple thirty-dollar component failure into an aggressive electrical fire inside your cabinet.
5. Burnt Contacts and Pitted Contact Points
Every time high amperage passes through closing contacts, it blasts away microscopic particles of metal. After a few hot summers, smooth metal pads end up looking like pitted contact points covered in rough craters and scorched copper. That reduced surface area turns the switch into an electrical bottleneck, creating massive resistance.

That high electrical resistance generates extreme heat, baking the surrounding plastic frame until it turns brittle and charred. The smell is unforgettable: an unmistakable, pungent, fishy odor of burnt phenolic resin that hits your nose the moment you loosen the service panel screws. If those contact pads look like burned barbecue charcoal instead of shiny silver coins, that switch is completely finished.
Hidden Mechanical and Electrical Culprits That Mimic a Bad Contactor
Clogged Condensate Drain Lines and Tripped Float Switches
Before you spend an afternoon ordering replacement electrical parts, walk inside and check your indoor air handler. Modern building codes require an electronic float switch (often branded as a Safe-T-Switch) installed directly into the secondary drain port or drain pan. When thick algae or white slime plugs your indoor PVC drain line, water backs up and lifts the little magnetic float.
That float switch wires straight into your thermostat’s low-voltage red (R) or yellow (Y) control circuit. The second that float lifts, it breaks the 24V loop to prevent thousands of dollars in water damage to your ceilings. Because the contactor coil outdoors suddenly loses its 24-volt signal, the switch stays open, tricking homeowners into thinking their outdoor contactor died.
Heat Pump Defrost Board Cycling vs. Straight AC Contactor Issues
Heat pumps run year-round, which means their contactors take twice the beating of a standard cooling-only air conditioner. During winter, frost naturally builds up on the outdoor coil, requiring the system to enter a defrost cycle every 30 to 90 minutes. The electronic defrost control board uses built-in relays to switch the reversing valve and cycle the contactor.
If an outdoor ambient temperature sensor goes bad or the defrost board develops charred solder joints, the contactor will rapidly chatter only when shifting into defrost mode. If you own a heat pump, always pay attention to whether that chattering happens strictly during cold winter transitions before condemning the contactor switch itself.
Dual Run Capacitor Test: Rule Out Capacitor Decay Under Load
Before replacing a contactor that appears dead, always run a dual run capacitor test. That silver, round aluminum can inside the electrical bay (typically rated around 45/5 microfarads) gives your compressor and fan motor the electrical kick they need to start spinning. When a capacitor loses more than 10 percent of its microfarad rating, the compressor motor will let out a loud groan and trip its internal overload without ever starting.
Homeowners regularly mistake that loud startup hum for a failing contactor relay. You can test the capacitor yourself using a multimeter that features a microfarad (MFD or µF) setting. If the numbers on your meter screen fall below the tolerance stamped on the side of the metal can, swapping the capacitor will get your cold air flowing again.
High Pressure Cutoff Switch and Refrigerant Safety Interlocks
Your outdoor unit features built-in safety switches wired directly in series with that low-voltage contactor coil. A high pressure cutoff switch constantly monitors the sealed copper lines and trips wide open if head pressures reach dangerous levels (around 450 to 600 PSI on modern R-410A units). When that switch trips, it instantly kills the 24-volt circuit feeding the contactor.
Because the contactor coil loses its control voltage, the spring pulls the contacts up, perfectly mimicking a burned-out coil. A low-pressure switch behaves the exact same way if an underground refrigerant leak empties the system. Always verify whether 24 volts is actually reaching the contactor coil before throwing the switch in the trash.
Smart Thermostat C-Wire Issues Causing Voltage Drops and Chatter
Installing a shiny new Wi-Fi smart thermostat without running a dedicated “C” (common) wire is a classic recipe for contactor problems. Some smart thermostats attempt to “steal power” over the yellow cooling wire to keep their internal batteries charged without a continuous common return path. This trickle of parasitic current flows straight through your outdoor contactor coil.
This setup often causes your control voltage to bounce erratically between 14 and 18 volts whenever the cooling kicks on. The contactor coil does not get enough juice to seat firmly, resulting in that harsh, rattling contactor chatter. Running a proper common wire or installing an add-a-wire power adapter fixes the issue every single time.
Pests in the Points: The “Ant Bridge” Electrical Short
Bugs cause a shocking amount of electrical damage on outdoor condensing units across the country. For reasons entomologists still debate, fire ants and tawny crazy ants are intensely attracted to 60Hz electromagnetic fields. They crawl inside the open contactor frame in dense swarms, nesting right between the open contact faces.
When the magnet pulls down, the closing metal points crush dozens of ants at once. Their burned bodies leave behind a non-conductive layer of carbon that prevents electricity from flowing to the compressor. In heavy infestations, the pile of dead insects forms a conductive bridge to the grounded metal chassis, blowing the low-voltage fuse or shorting the contactor completely.
Compressor Internal Thermal Overload Lockout
Modern air conditioning compressors have a built-in safety switch buried directly inside the motor windings. If dirty coils, outdoor fan failure, or low refrigerant cause the compressor housing to soar past 225 degrees Fahrenheit, this internal bimetallic switch pops open. High voltage sits waiting at the compressor terminals, but the motor refuses to run.
I have seen plenty of homeowners see the contactor pulled down, watch the fan spin, and assume the contactor is failing to deliver power. What is actually happening is the compressor went into thermal lockout to keep from melting its own internal components. Pulling the disconnect and giving the outdoor unit two hours to cool down allows that internal thermal switch to click back shut.
Dangerous DIY Mistakes to Avoid When Inspecting a Contactor
Why Sanding or Filing Pitted Contacts Guarantees System Burnout
One of the most dangerous backyard repairs is using a piece of sandpaper, emery cloth, or a metal file to scrub carbon off pitted contacts. While this might get you through the night by restoring a quick connection, you have effectively ruined the switch. Factory contact pads are manufactured with a precision-bonded, micro-thin plating of silver-cadmium alloy designed to handle high-temperature electrical arcs.
Filing that contact pad grinds that protective silver alloy right off, exposing soft, raw copper underneath. Raw copper melts at a much lower temperature under heavy startup amperage. Within forty-eight hours, those bare copper faces will weld themselves shut under load, forcing your compressor to run continuously until it overheats and burns out.
The Hidden Hazards of Manually Depressing the Armature Plunger
You will see plenty of online videos where someone jams an insulated screwdriver into the center of a contactor to force the compressor on. Never do this on an energized, live system. If your hand slips on a 240-volt terminal, the resulting arc flash will instantly blind you, blast molten copper across your hands, and destroy your tool.
Worse yet, manually forcing the switch down overrides every single built-in safety control on your unit. If the contactor stayed open because a high-pressure safety switch tripped to prevent a catastrophic copper rupture, forcing that plunger down can blow the internal valves out of your compressor. Use your multimeter to diagnose the circuit safely instead of risking your eyesight on a mechanical shortcut.
How to Test an AC Contactor Using a Multimeter
Step 1: Disconnect High Voltage at the Breaker and HVAC Disconnect Box
Start by switching your indoor thermostat to “Off.” Head to your home’s main electrical service panel and flip the double-pole breaker labeled “AC” or “Condenser” to the full Off position. Next, walk outside to the unit, open the metal disconnect box on the siding, and pull the disconnect handle straight out.
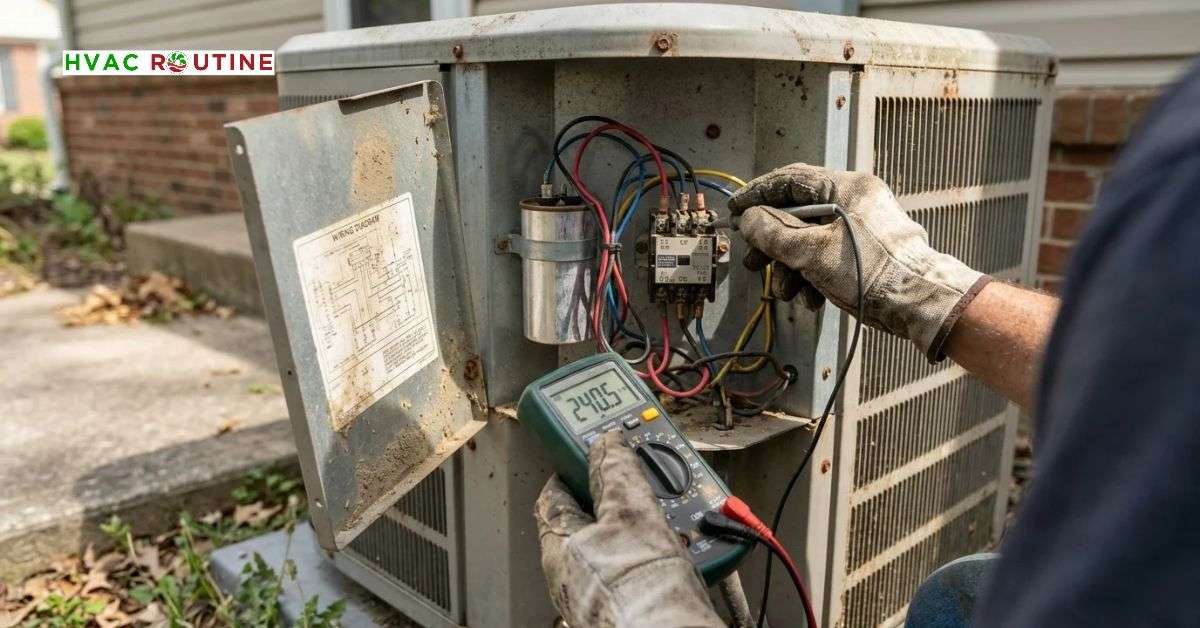
Always verify that the cabinet is completely dead using a digital multimeter rated CAT III or higher. Touch your meter probes line-to-line, line-to-ground, and load-to-ground across the top contactor screws to confirm zero voltage before placing your fingers near any wiring. Never skip this verification step; your life depends on it.
Step 2: Visual Inspection and the Smartphone Photo Trick
Back out the 5/16-inch or 1/4-inch sheet metal screws securing the electrical service cover and set the door aside. Before you touch a single wire, pull out your smartphone and snap three clear, well-lit photos of the wiring from different angles. When you have four loose black wires hanging in front of you twenty minutes from now, those photos will clearly show which wire belongs on L1 versus T1.
Shine a bright flashlight directly into the core of the contactor. Inspect the plastic housing for signs of melting, charred terminals, or insect nests. Using an insulated wooden pencil or plastic tool, gently press the center plunger inward while the power is off; it should slide smoothly and spring back without sticking or feeling gritty.
Step 3: Check Contactor Coil Resistance (Ohms Test)
Slide the two low-voltage slip-on spade wires off the coil terminals on the sides of the switch. Turn your digital multimeter selector dial to the Ohms (Ω) setting. Press your meter probes firmly against the two bare low-voltage male spade terminals.
A healthy 24V contactor coil resistance reading sits between 10 and 20 ohms on most residential split systems. If your multimeter screen displays “OL” (open loop) or infinite resistance, the hair-thin copper wire inside has snapped or burned through. If you read 0 ohms, the coil has a dead short that will blow your indoor control board fuse the instant you turn the system back on.
Step 4: Perform a Multimeter Continuity Check Across Terminals
Turn your multimeter dial to the audible continuity setting (the soundwave icon). Place your red probe on the top line terminal (L1) and your black probe on the bottom load terminal (T1) on that exact same side. With the plunger resting in its natural, spring-loaded open state, your meter should read “OL” and remain completely silent.
Now, use your wooden pencil to gently press the center plunger down to simulate normal magnetic operation. The meter should immediately let out a solid beep and show a resistance reading under 0.2 ohms. Any intermittent crackling tone, jumping numbers, or resistance over 1 ohm indicates deep pitted contact points that can no longer carry heavy current safely.
Step 5: Advanced Field Test: Live Voltage Drop Under Load
This is a clean diagnostic trick used on service calls to catch hidden contact wear that resistance tests can miss. With the outdoor unit put back together and safely running under full load, switch your digital multimeter to the AC Millivolts (mV) or low AC Volts setting. Carefully place one probe on the incoming line lug (L1) and the second probe on the outgoing load lug (T1) on that exact same side.
A factory-fresh contact pad will show virtually zero voltage drop across its faces, reading well below 0.1 volts (100 millivolts). If your meter measures a drop greater than 0.2 to 0.4 volts, electricity is struggling to push through internal pitting and carbon buildup. That electrical bottleneck is producing intense heat that will soon destroy the switch and strain your compressor.
Contactor Relay Diagnostic and Troubleshooting Table
| Symptom Observed | Probable Cause | Action |
| Outdoor unit buzzing sound or rapid chattering | Voltage under 18V AC, missing C-wire, or dirt inside the plunger | Test 24V transformer output, install C-wire adapter, clean plunger core |
| Outdoor fan and compressor run non-stop | Welded contactor points caused by severe electrical arcing | Pull disconnect block out immediately; replace the contactor switch |
| Condenser silent while indoor blower runs | Tripped condensate float switch, burnt coil, or open pressure switch | Clear indoor PVC drain line, check 24V at coil, test coil resistance |
| Heat pump chatters loudly during winter operation | Faulty defrost board relay or failing outdoor temperature sensor | Test defrost circuit inputs; check reversing valve solenoid voltage |
| HVAC breaker trips immediately upon cooling call | High-voltage short circuit across line lugs or grounded motor | Check continuity between line terminals and condenser casing ground |
| Burnt plastic odor and dark carbon around lugs | High electrical resistance from heavily pitted contact points | Replace the contactor; trim back and re-terminate heat-damaged wire |
How to Select the Exact Replacement Contactor
Reading the Spec Label: Voltage, Poles, and FLA Ratings
Before ordering a replacement, read the manufacturer specification sticker affixed to the plastic side of your existing switch. Buying a part with inadequate electrical ratings creates an immediate fire hazard. Focus on three primary specifications:
- Coil Voltage: Look for 24VAC (residential air conditioners use 24V coils; never accidentally buy a 120V or 240V coil model).
- Full Load Amps (FLA): Matches the running current capacity. Most residential units require a 30A or 40A inductive rating. You can safely replace a 30A contactor with a 40A model, but never replace a 40A contactor with a 30A model.
- Pole Count: Check whether your switch is a 1-Pole (single switch with brass shunt bar) or 2-Pole (dual switched contacts). Replacing a 1-pole with a 2-pole unit is acceptable and provides extra safety, provided you match the terminal connections accurately.
Top Replacement Brands and Supply Counter Advice
You do not need to pay an inflated price for a branded OEM part in a Carrier, Trane, or Lennox box to get your air conditioner back online. High-grade universal contactors built by established electrical manufacturers meet or exceed the original factory build quality. The top trusted brands include:
- Packard: Reliable, widely stocked residential contactors featuring silver alloy contacts and durable molded bases.
- Supco (Sealed Unit Parts Co.): Industry-leading enclosed contactor designs that block out ants, geckos, and dust.
- MARS (Motors & Armatures Inc.): Heavy-duty replacement switches featuring high mechanical cycle ratings and clear terminal labeling.
- Siemens & Square D: Commercial-grade industrial contactors known for reliable return springs and arc chutes.
When you walk up to the local HVAC supply house counter, do not say “I need a contactor for a Trane AC”—they will charge you top dollar for a branded box. Simply say: “I need a 24-volt, 30-amp single-pole contactor.” Under the federal Magnuson-Moss Warranty Act, installing an aftermarket component that matches factory electrical specifications cannot void your equipment warranty.
DIY Replacement vs. Calling a Licensed HVAC Professional
Tools and Step-by-Step Replacement Workflow
Replacing a worn contactor is a straightforward project for any homeowner who works carefully and respects electricity. Along with your multimeter, you will need 1/4-inch and 5/16-inch nut drivers, needle-nose pliers, and wire strippers.
Pro-Tip: Use electrical tape to stick a spare 3-amp or 5-amp blade fuse directly to the inside sheet metal of your indoor air handler door. If you accidentally slip and pop a low-voltage fuse during troubleshooting, you will not have to make an emergency run to the auto parts store.
Work methodically: transfer one wire at a time from the old switch directly to the matching terminal on your new contactor. Tighten the terminal screws down firmly; loose connections create high electrical resistance that will burn up your brand-new switch within months.
When to Call a Licensed HVAC Technician
Certain electrical issues require the specialized diagnostic tools and safety equipment of a licensed professional. If you pop the access door and discover wiring burned all the way down into the sealed compressor terminal box, stop and call an expert. Similarly, if your low-voltage fuse keeps blowing the moment you reinsert the disconnect handle, you have an active wire short somewhere in the walls.
Tripped safety switches also demand professional equipment. A high pressure cutoff switch that trips indicates a stuck expansion valve, an overcharged system, or a failing motor. Licensed technicians carry the required EPA certifications and digital manifold gauges to safely test sealed refrigerant lines.
Expected Contactor Lifespan and Replacement Costs
A standard residential AC contactor typically lasts between 5 and 10 years under normal operating conditions. However, harsh operating factors can cut that lifespan down to just 2 or 3 years. Severe short cycling from an oversized AC, persistent low voltage, dirty condenser coils, or yard insect swarms will rapidly degrade the contact faces.
An aftermarket replacement contactor costs between $15 and $35 through online supply houses. Completing the replacement yourself takes roughly thirty to forty-five minutes of methodical work. A professional service call from a licensed HVAC company typically runs from $150 to $350, covering diagnostic trip fees, technician labor, and a warranty on the work.
Preventing Premature Contactor Wear and Arcing
Upgrading to Fully Enclosed Contactors
Most residential air conditioners leave the factory fitted with open-frame contactor switches. These open designs leave electrical contact pads exposed to outdoor moisture, garden dirt, and swarming insects. Upgrading to a fully enclosed contactor keeps the internal moving parts sealed away from outdoor elements.
Enclosed models feature protective plastic shields surrounding the moving armature while leaving the screw terminals accessible. This simple design blocks ants from nesting on the contact faces and shields the metal pads from salty coastal air. Spending an extra ten dollars on an enclosed replacement switch can easily double its operating lifespan.
Keeping Outdoor Coils Clean to Lower System Amp Draw
Dirty outdoor condenser coils directly accelerate electrical wear on your contactor switch. When dirt, grass clippings, and tree seeds coat the aluminum fins, heat cannot leave the outdoor unit efficiently. This heat buildup spikes compressor head pressure, forcing the motor to draw significantly higher running amps.
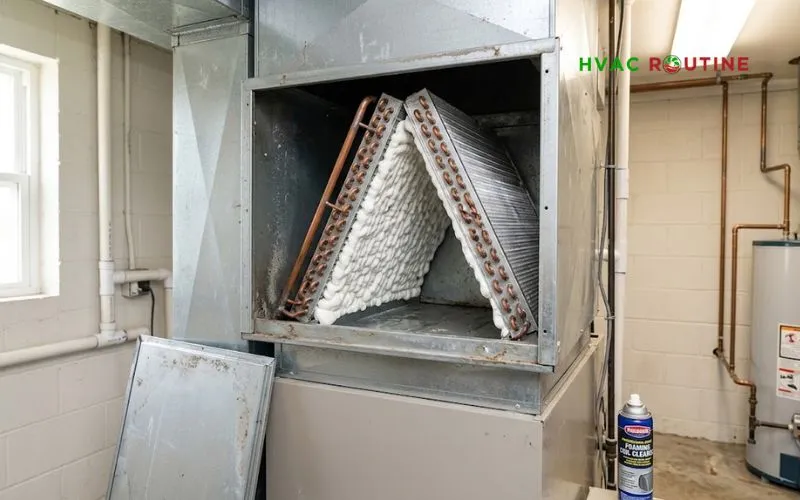
That elevated electrical current creates intense arc heat across the contactor pads every time the system starts and stops. Rinsing your condenser coils each spring with a garden hose and foaming coil cleaner keeps operating pressures within normal limits. Clean coils reduce electrical strain and keep your contactor working reliably throughout the hottest summer months.
Common Homeowner Troubleshooting Questions Answered
Can a faulty contactor damage my AC compressor?
Yes, a failing contactor can destroy a compressor motor. When contact points weld together, the outdoor compressor continues running without stop, even when your indoor blower shuts down. The refrigerant lines freeze, sending raw liquid refrigerant back into the compressor pump, which destroys internal valves.
Conversely, heavily pitted contact points create voltage drops that starve the compressor for power. Running an electric motor on under-voltage causes internal windings to overheat rapidly, burning out the motor insulation.
Why does my outdoor contactor make a loud clicking noise every few minutes?
A contactor that clicks repeatedly every few minutes indicates your system is short cycling on a safety switch. When your air conditioner hits a safety limit, such as a clogged condensate drain line or an overheating compressor, the control board cuts 24V power to the coil.
Once temperatures or pressure drop slightly, the switch resets and tries to pull the contactor down again. Inspect your air filter, flush your indoor condensate drain pipe, and ensure the outdoor coil is free of leaves and debris.
Can I spray electrical contact cleaner on my AC contactor while it is running?
Never spray aerosol contact cleaner into an energized outdoor electrical panel. The heavy electrical arc produced when the contactor pulls in will ignite flammable solvent vapors instantly, causing an electrical fireball.
If you use non-conductive electrical cleaner to flush dust or dead ants from the mechanism, do so only after pulling the outdoor disconnect handle and switching off the breaker. Allow the solvent to evaporate completely for at least fifteen minutes before restoring electrical power.
Is it normal for an AC contactor to feel warm to the touch?
The low-voltage electromagnetic coil on a contactor naturally generates a mild amount of heat while energized. It is completely normal for the plastic sides of the contactor to feel mildly warm, roughly 100 to 110 degrees Fahrenheit, during a normal cooling cycle.
However, if the plastic around the high-voltage screw lugs looks discolored, warped, or feels hot enough to burn your skin, high electrical resistance is occurring. That intense heat means your terminal screws are loose or your internal contact pads are severely pitted and require immediate replacement.
Will installing a universal aftermarket contactor void my AC warranty?
Installing an aftermarket contactor made by brands such as Packard, Supco, or MARS will not void your overall manufacturer warranty, provided the replacement meets the exact electrical specifications of your system. Magnuson-Moss Warranty Act regulations protect consumers from being forced to buy solely brand-name replacement parts.
As long as the replacement unit matches the required coil voltage (24VAC), meets or exceeds the Full Load Amps rating (30A or 40A), and is wired correctly, your factory equipment and compressor coverage remain protected.
An AC contactor relay is a sacrificial part designed to take the beating of heavy electrical arcs so your expensive compressor does not have to. Recognizing early contactor relay switch failure symptoms lets you swap out a thirty-dollar switch before damaged contacts take down your entire cooling system. Inspect the electrical compartment every spring, keep the coils clean, and replace any switch showing heavy pitting, chatter, or burnt plastic.