
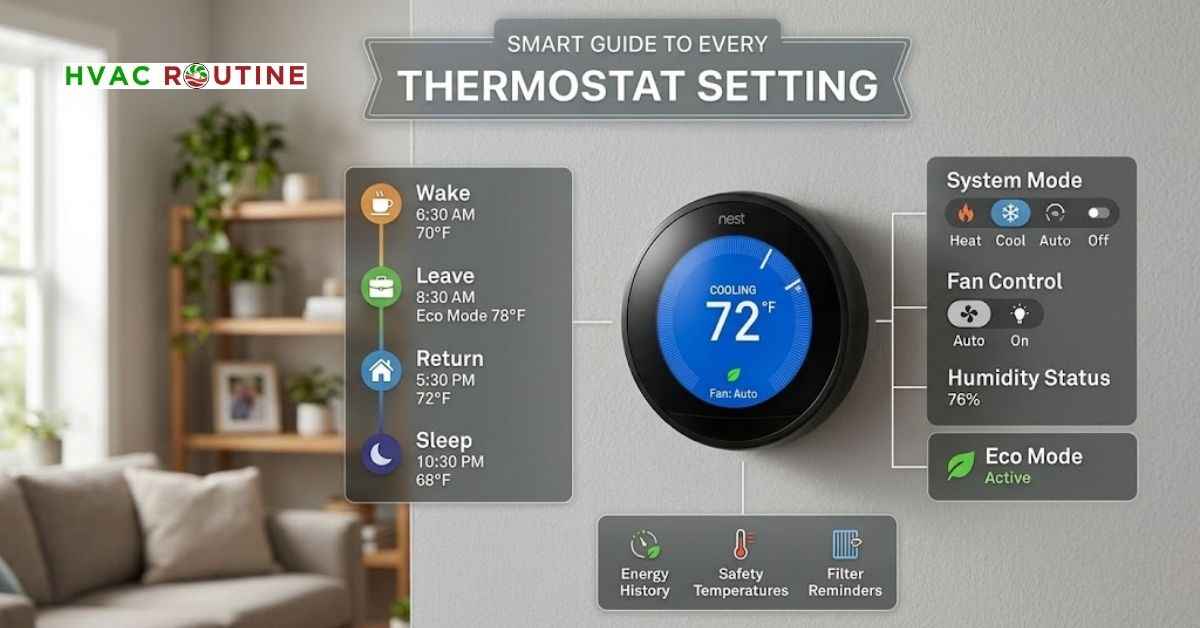
Finding the right thermostat setting can save you up to ten percent a year on your heating and cooling bills. Almost every family deals with daily temperature disagreements where one person feels chilly while someone else breaks into a sweat.
I have visited dozens of homes where people constantly push the wall dial back and forth, only to wonder why their monthly utility bills keep climbing. A few smart adjustments will keep your entire household comfortable while protecting your air conditioner and furnace from premature wear and tear.
You can take control of your energy costs today with practical adjustments tailored to your specific HVAC system.
What You'll Learn ⭐⭐⭐⭐⭐
- HVAC Tools and Safety Checklist
- Master the Heat and Cool Thermostat Setting for Shoulder Seasons
- Understanding the Temperature Deadband
- Fan Auto vs Fan On: Which Saves More Money?
- Recommended Thermostat Setting for Summer Cooling
- Smart Away Setpoints and Geofencing
- Nighttime Sleep Settings and the Ceiling Fan Trick
- Control Humidity to Make 76°F Feel Cool
- Selecting the Ideal Thermostat Setting for Winter Comfort
- What Is the Real Average Thermostat Setting in Winter?
- Nighttime Setbacks for Gas Furnaces
- Heat Pump Rules: Auxiliary Heat vs Emergency Heat
- Special Rules for Ductless Mini-Split Systems
- Heating Rules for Hydronic Boilers and Baseboards
- Avoid Deep Setback Swings
- Installation Rules: Proper Wall Placement and C-Wire Solutions
- Calibrate Sensor Drift and Configure Advanced Menu Settings
- Adjusting Temperature Offsets and Cycle Rates
- Smart Automations: Window Sensors and Multi-Zone Balancing
- Window Open Auto-Shutoff Routines
- Smart Thermostat Tips for Apartment Renters
- Non-Invasive Upgrades and Safe Storage
- How to Claim Utility Rebates and Peak Demand Rewards
- Instant Rebates from Local Power Companies
- Enrolling in Peak Demand Rewards Programs
- Fast Diagnostic Table for Common Thermostat Issues
- Calculating Your Energy Savings and Payback Time
- The Energy Savings Formula
- Real-World Solutions to Common Temperature Dilemmas
- Does Setting the Thermostat to 60°F Cool the House Faster?
- Why Does 70°F Feel Cold in My Living Room?
- What Is the Safest Lowest Thermostat Setting for Winter When Leaving Home?
- Printable Year-Round Thermostat Cheat Sheet
HVAC Tools and Safety Checklist
Tools Required:
- Precision digital screwdriver set
- Digital multimeter for testing twenty-four-volt control power
- Small bubble level for accurate wall mounting
- Standalone digital hygrometer to monitor room humidity
Safety Warnings:
- Turn off the main electrical breaker before touching any thermostat baseplate wiring.
- High-voltage baseboard heaters run on dangerous line voltage and demand extra caution.
- Never set your winter vacation temperature below 55°F to prevent frozen pipes.
- Always allow a five-minute compressor delay between heating and cooling to avoid motor burnout.
When to Call a Professional Technician:
- Your furnace short-cycles on and off every two to three minutes.
- The circuit breaker trips whenever your outdoor heat pump starts up.
- Your auxiliary heat strips run nonstop during mild weather above 40°F.
- You detect an electrical burning smell near your indoor air handler.
Master the Heat and Cool Thermostat Setting for Shoulder Seasons
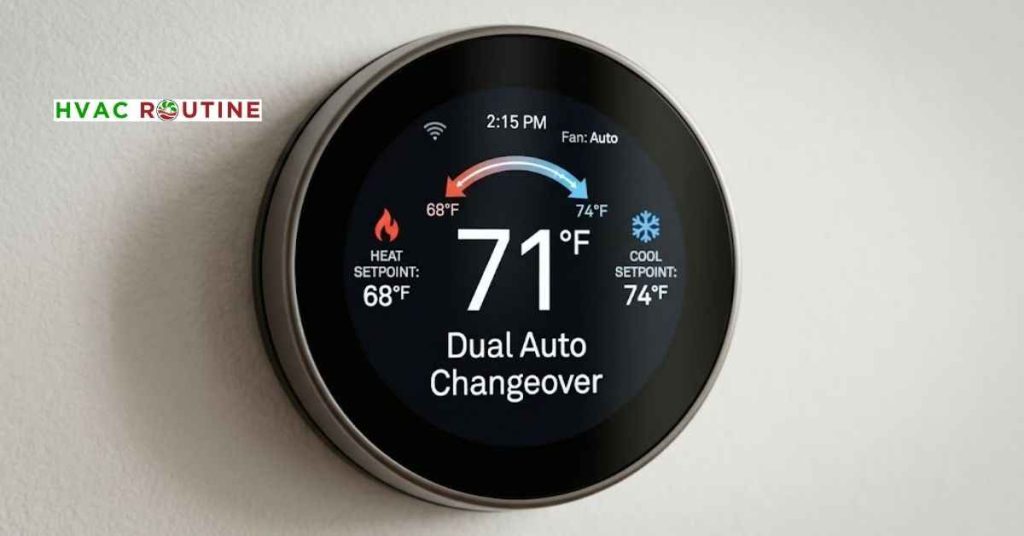
Spring and autumn weather can change rapidly from chilly mornings to sweltering afternoons. Modern smart thermostats offer a dual mode often called auto changeover.
This heat and cool thermostat setting switches between your furnace and air conditioner automatically as outdoor conditions shift.
You select a heating minimum and a cooling maximum. Your system manages the transition on its own without requiring you to walk over to the wall plate twice a day.
Understanding the Temperature Deadband
Your HVAC equipment needs a protective buffer between heating and cooling cycles. Engineers call this temperature gap the deadband. Set a deadband buffer of at least four degrees Fahrenheit between your heat and cool points.
For example, set your heat to 68°F and your air conditioner to 73°F. This safety gap prevents your air conditioner and furnace from fighting each other during the same afternoon.
Fan Auto vs Fan On: Which Saves More Money?
Always leave your thermostat fan set to Auto for standard daily operation. The Auto setting runs the blower fan only when the heating or cooling equipment actively produces conditioned air. Setting the fan to On forces the blower motor to run twenty-four hours a day.
In humid climates, continuous fan operation pulls moisture off wet cooling coils and blows it right back into your living spaces. Select an hourly circulation cycle instead if your thermostat offers smart scheduling.
Running the fan for ten to fifteen minutes every hour balances room temperatures without driving up electricity costs.
Recommended Thermostat Setting for Summer Cooling
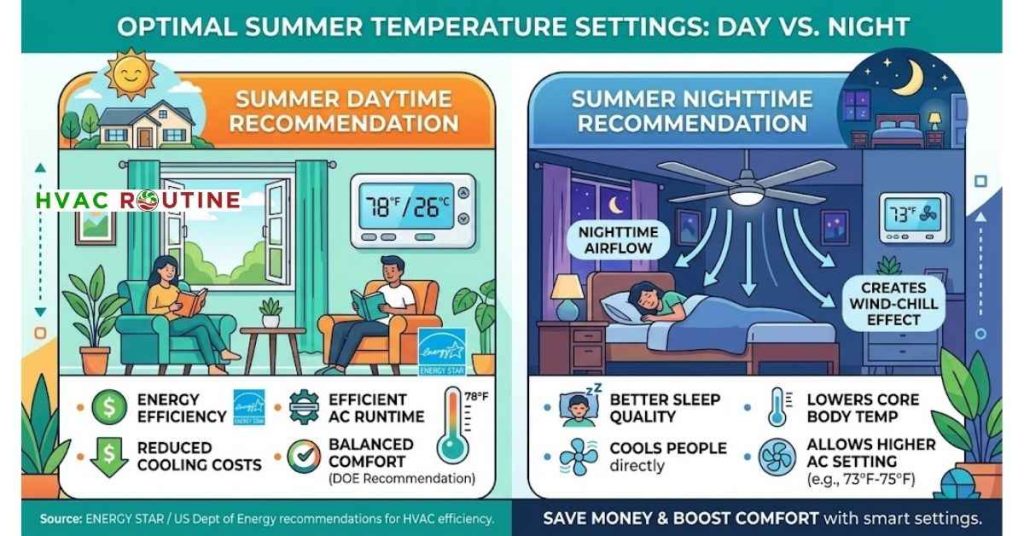
The U.S. Department of Energy recommends a daytime baseline of 78°F when you stay home and awake during the summer. Every degree below 78°F increases your air conditioning energy consumption by roughly three to five percent.
If 78°F feels too warm initially, try raising the temperature by one single degree every three days to give your body time to adapt.
Smart Away Setpoints and Geofencing
Raise your cooling target to 85°F whenever you leave the house for more than four hours. An empty house does not need constant refrigeration.
Smart thermostat geofencing detects when your smartphone leaves the driveway and switches your system into energy-saving mode automatically.
The companion app cools your home back to your preferred target fifteen minutes before you walk through the front door.
Nighttime Sleep Settings and the Ceiling Fan Trick
The National Sleep Foundation notes that human bodies sleep best in cooler surroundings between 65°F and 72°F.
Lowering your central air conditioner down to 65°F during a summer heatwave can overload your compressor and produce shocking utility bills.
Set your thermostat to 73°F at night and turn on a ceiling fan.
Spin your ceiling fan counter-clockwise during warm months to push a cooling breeze downward.
This wind-chill effect makes 73°F feel like 69°F on your skin.
Turn off the fan when you leave the bedroom because fans cool people, not empty rooms.
Control Humidity to Make 76°F Feel Cool
High indoor humidity makes warm air feel sticky and suffocating. Your air conditioner removes moisture from the air while it cools your living space. Target an indoor relative humidity level between 45% and 50%.
Set your smart thermostat to use extended blower ramp-downs or droop cooling if your equipment supports humidity management. A dry room at 76°F feels significantly cooler and fresher than a humid room at 72°F.
Selecting the Ideal Thermostat Setting for Winter Comfort
Setting your daytime heating target to 68°F balances warm comfort with sensible monthly heating bills.
Lowering your heat by seven to ten degrees for eight hours a day can cut annual heating costs by ten percent according to federal energy data.
You save money because a cooler interior slows the natural loss of heat through exterior walls and attic spaces.
| Living Scenario | Winter Target | Summer Target |
|---|---|---|
| Home & Awake | 68°F (20°C) | 78°F (26°C) |
| Sleeping Hours | 62°F – 65°F | 73°F (+ Fan) |
| Away (>4 Hours) | 58°F – 60°F | 85°F (29°C) |
| Vacation / Minimum | 55°F (13°C) Min | 88°F (31°C) |
What Is the Real Average Thermostat Setting in Winter?
Most American households maintain an average thermostat setting in winter between 70°F and 72°F. While this range feels cozy, it forces furnace burners and heat pump compressors to work much harder during freezing mornings.
Lowering your baseline from 72°F to 68°F saves up to twelve percent on monthly heating fuel. Put on a comfortable sweater, grab a warm throw blanket, and let your heating equipment rest.
Nighttime Setbacks for Gas Furnaces
Drop your furnace setpoint down to 62°F or 64°F when you climb into bed.
Heavy blankets and flannel sheets provide natural warmth without drawing energy from your furnace.
Program your system to warm the house back up thirty minutes before your morning alarm sounds.
Heat Pump Rules: Auxiliary Heat vs Emergency Heat
[Image: Diagram comparing automatic auxiliary heat staging with manual emergency heat lockouts on a digital thermostat screen]
Heat pump owners frequently confuse auxiliary heat with emergency heat.
Understanding this difference protects your equipment and prevents massive electric bill spikes.
| Feature | Auxiliary Heat | Emergency Heat |
|---|---|---|
| Operation Mode | Automatic supplementary | Manual override mode |
| Outdoor Unit | Runs with electric coils | Completely locked out |
| Power Draw | Moderate to High | Extreme electrical draw |
| When to Use | System controls it | Outdoor unit breakdown |
What Auxiliary Heat Does
Auxiliary heat turns on automatically when outdoor temperatures drop too low for your heat pump to keep up alone.
The outdoor heat pump compressor runs alongside electric resistance heat strips to bridge the gap.
The system turns off these auxiliary strips as soon as your home reaches the target temperature.
When to Switch on Emergency Heat Manually
Emergency heat locks out your outdoor compressor completely. The system relies entirely on high-draw electric resistance heat strips to warm your home.
Turn on Emergency Heat manually only if your outdoor unit breaks down, loses fan function, or gets encased in thick sheet ice during a winter storm. Never run Emergency Heat during normal winter weather because it will double or triple your monthly power bill.
Special Rules for Ductless Mini-Split Systems
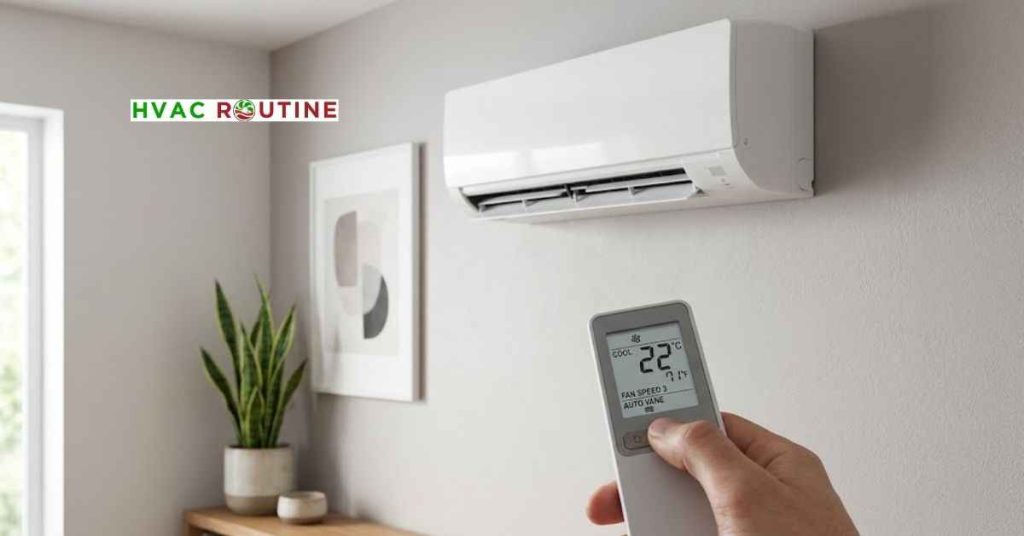
Ductless mini-splits use variable-speed inverter compressors rather than standard single-stage motors. These systems operate far differently from traditional central ducted furnaces.
Applying standard ten-degree setbacks to a mini-split actually wastes power instead of saving it.
Why the “Set It and Forget It” Rule Wins for Inverters
Inverter compressors adjust their motor speed smoothly to maintain a constant indoor temperature. They sip tiny amounts of electricity once a room reaches your target setpoint. Dropping your mini-split temperature drastically at night forces the inverter to ramp up to one hundred percent capacity the next morning.
High-speed operation burns through excess electricity and negates your energy savings. Pick a comfortable target like 70°F for winter heating or 74°F for summer cooling and let the equipment run steadily.
Optimizing Mini-Split Fan and Louver Directions
Set your mini-split fan mode to Auto rather than a fixed manual speed. The onboard computer automatically slows the blower when the room reaches the target temperature.
Point the motorized airflow louvers straight down toward the floor during winter heating cycles. Warm air naturally rises, so directing the supply air downward heats the living zone evenly. Aim the louvers straight out or slightly upward during summer cooling cycles to let heavy, cool air fall gently through the room.
Heating Rules for Hydronic Boilers and Baseboards
Radiant baseboards and hot water boilers operate differently from standard forced-air gas furnaces.
Water takes much longer to heat up and circulate through cast-iron radiators than blown warm air.
Avoid Deep Setback Swings
Do not lower your boiler thermostat by eight to ten degrees overnight. Reheating a cold floor slab or chilled baseboard pipes forces the boiler to run continuously for hours in the morning. Maintain a steady setpoint day and night, or limit setbacks to no more than two or three degrees.
A steady temperature maintains continuous thermal mass in your floors and walls while saving fuel.
Installation Rules: Proper Wall Placement and C-Wire Solutions
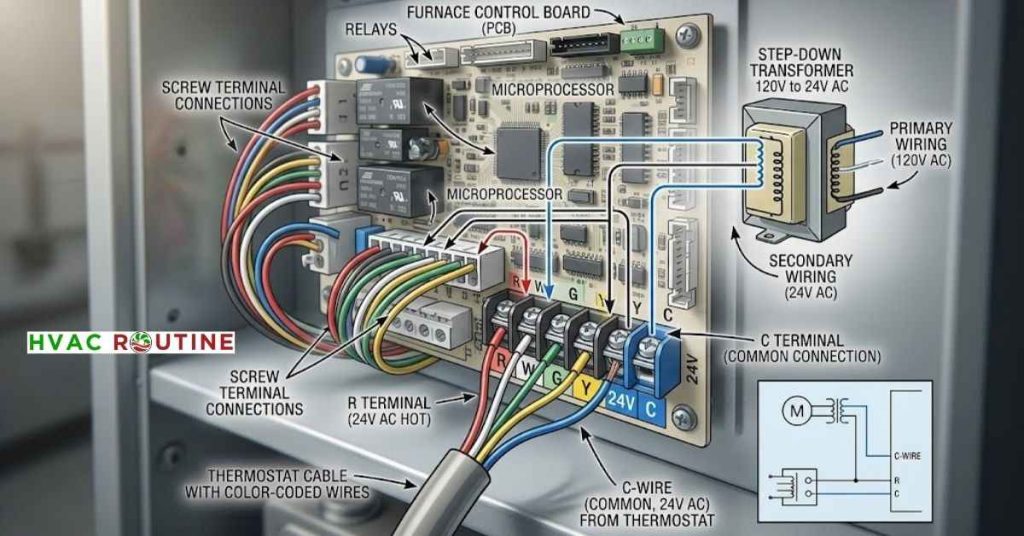
Thermostat placement directly affects how accurately your system reads room comfort.
Wall Placement and Mounting Height
Mount your thermostat roughly 4.5 to 5 feet above the floor on an interior wall. Keep the thermostat away from direct sunlight, drafty hallways, exterior doors, and kitchen stoves.
I often see homeowners struggle with ghost heating cycles simply because cold air blows through the drywall opening behind the wall plate. Pack non-flammable insulation putty into the wall wire opening behind the baseplate to block internal wall drafts.
Fixing Missing C-Wire Issues in Older Homes
Smart Wi-Fi thermostats require a steady twenty-four-volt C-wire (Common Wire) for constant power. Older homes with two-wire or four-wire setups lack this dedicated power line. Thermostats that steal power without a C-wire often experience screen flickering, dropped Wi-Fi connections, and short-cycling relays.
Install a Power Extender Kit (PEK) inside your furnace control board to transform four wires into five pathways. Alternatively, use a twenty-four-volt plug-in wall transformer to supply direct power without running new cables through finished walls.
Calibrate Sensor Drift and Configure Advanced Menu Settings
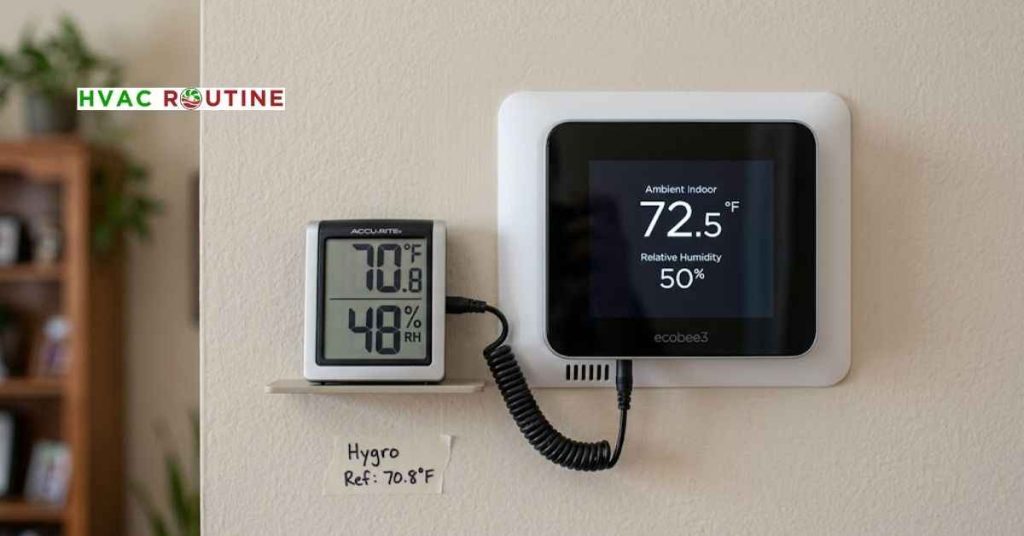
Sometimes your wall display says 72°F, but an independent thermometer reads 70°F. Most modern thermostats allow you to correct this discrepancy in the advanced installer menu.
Adjusting Temperature Offsets and Cycle Rates
Place a calibrated digital thermometer next to your wall thermostat for thirty minutes. Open your thermostat settings and locate the Temperature Calibration or Offset menu. Adjust the reading up or down by one or two degrees to match your reference thermometer.
Check your system Cycle Rate setting, often listed as Cycles Per Hour (CPH). Setting a gas furnace to three cycles per hour prevents the burner from firing on and off too rapidly.
Secret Settings for Nest and Ecobee Devices
Open the installer settings on an Ecobee to adjust your Compressor Minimum Outdoor Temperature. Set this lockout limit to 15°F to ensure your heat pump runs down to freezing conditions before relying on electric heat strips.
Enable AC Overcool Max on your Ecobee or Cool to Dry on a Google Nest to drop indoor humidity by running the cooling cycle slightly longer at low blower speeds. Configure Minimum Compressor Run Time to at least five minutes to protect compressor motor windings from early failure.
Smart Automations: Window Sensors and Multi-Zone Balancing
Connecting smart accessories prevents conditioned air from going to waste.
Window Open Auto-Shutoff Routines
Install simple magnetic contact sensors on exterior windows and patio doors. Link these sensors to your smart thermostat using Apple Home, Amazon Alexa, or Home Assistant. Create an automation rule: If any living room window stays open for more than three minutes, switch the HVAC mode to Off.
Have the system resume its normal heating or cooling schedule once you close the window. This simple routine prevents your system from trying to air-condition the entire neighborhood.
Balancing Multi-Zone Damper Systems
Zoned HVAC systems use motorized duct dampers to direct airflow to different sections of your house. Keep temperature differences between adjacent zones within two to three degrees of each other.
Setting one zone to 68°F and another to 76°F creates severe duct static pressure that stresses your blower motor. Balanced zone setpoints allow duct dampers to distribute conditioned air smoothly across all living spaces.
Smart Thermostat Tips for Apartment Renters
Living in a rental property should not stop you from saving money on monthly utility bills. You can upgrade your thermostat without violating your lease agreement or damaging interior walls.
Non-Invasive Upgrades and Safe Storage
Turn off the power breaker and take a clear smartphone photo of the existing wire connections before unscrewing anything. Label every colored wire with masking tape using standard letter codes (R, W, Y, G, C). Store the landlord’s original thermostat, mounting screws, and faceplate safely inside a labeled plastic bag.
Mount your new smart unit using the existing screw holes whenever possible to avoid drilling new anchor points into the drywall. Reinstall the landlord’s original hardware on moving day so you get your security deposit back in full.
How to Claim Utility Rebates and Peak Demand Rewards
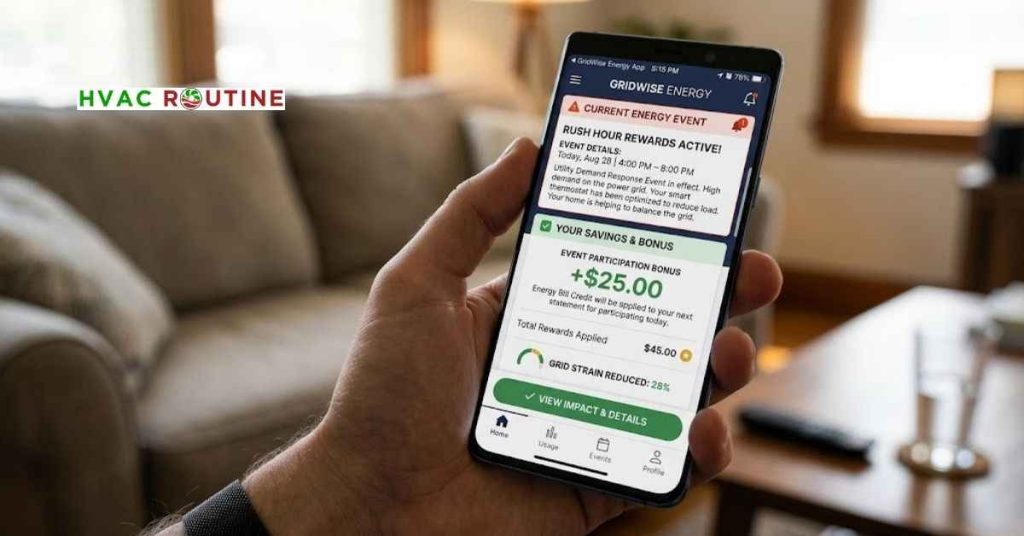
Your local power company wants you to use less energy during peak grid hours. Many electrical utilities offer direct cash incentives that offset the upfront cost of a new smart thermostat.
Instant Rebates from Local Power Companies
Check your electric and natural gas utility websites before purchasing any new smart hardware. Most major regional power providers offer instant rebates between $50 and $100 per qualifying smart thermostat. You can often buy discounted hardware directly through your utility provider’s online marketplace.
These instant discounts immediately cut your investment payback window down to just a few months.
Enrolling in Peak Demand Rewards Programs
Many utilities run voluntary demand-response programs, such as Nest Rush Hour Rewards or local energy savings events.
The utility sends a signal to your thermostat to pre-cool your home by one or two degrees ahead of extreme afternoon heatwaves.
The system then lets your indoor temperature float up slightly during the peak grid emergency.
You maintain full control to override these temperature adjustments on your smartphone at any moment.
Participating households often receive an upfront $25 to $50 enrollment bonus plus recurring bill credits at the end of every summer.
Fast Diagnostic Table for Common Thermostat Issues
| Symptom | Likely Root Cause | Quick DIY Fix |
|---|---|---|
| Display is on, but no heat/AC | Tripped furnace breaker or fuse | Reset breaker; replace fuse |
| Room temp misses setpoint | Clogged air filter; shut vents | Replace filter; open all vents |
| System short-cycles frequently | Draft in wall hole or bad spot | Seal backplate hole with putty |
| Screen blinks and Wi-Fi drops | Missing 24V C-wire power | Install a Power Extender Kit |
| Temperature reads 2-3° off | Sensor calibration drift | Adjust offset in advanced menu |
Calculating Your Energy Savings and Payback Time
Understanding the math behind seasonal setbacks helps you track your true household return on investment.
The Energy Savings Formula
A standard eight-hour setback of seven to ten degrees generates roughly ten percent in annual heating and cooling savings.
Use this simple calculation to estimate your personal financial savings:
Average Monthly HVAC Energy Cost × 0.10 × 12 Months = Annual Household Savings
For example, if you spend an average of $200 per month on heating and cooling, a ten percent reduction saves you $20 every month.
That simple adjustment keeps $240 in your bank account every single year.
Because a reliable smart thermostat costs between $120 and $200, the hardware pays for itself in less than one full year of operation.
Real-World Solutions to Common Temperature Dilemmas
Does Setting the Thermostat to 60°F Cool the House Faster?
Setting your temperature dial to extreme cold does not speed up the cooling process at all. Standard residential single-stage air conditioners blow air at the exact same speed and temperature regardless of your setpoint. Dropping your thermostat to 60°F only forces your compressor to run much longer without stopping.
Set the dial to your true desired comfort number and give the system time to reach it.
Why Does 70°F Feel Cold in My Living Room?
Air drafts, cold window glass, and dry air can make a room feel colder than the number on your wall. Winter indoor air often drops below thirty percent relative humidity, which causes skin moisture to evaporate rapidly.
Install a standalone humidifier to keep indoor winter humidity near forty percent. Moist winter air holds heat better and feels significantly warmer on your skin.
What Is the Safest Lowest Thermostat Setting for Winter When Leaving Home?
Set your thermostat no lower than 55°F when you leave your house empty during freezing weather. Temperatures below 55°F allow exterior plumbing pipes and crawl spaces to drop into the freezing danger zone. A 55°F baseline protects your plumbing system while keeping heating costs minimal.
Printable Year-Round Thermostat Cheat Sheet
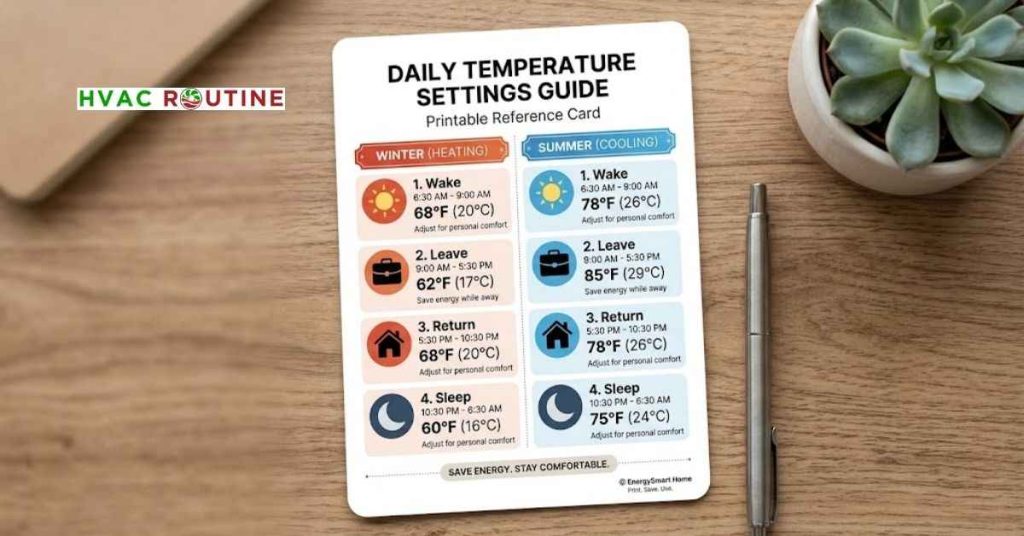
| Scenario | Winter Heating | Summer Cooling |
|---|---|---|
| Home & Active | 68°F (20°C) | 78°F (26°C) |
| Overnight Sleeping | 62°F – 65°F | 73°F (+ Ceiling Fan) |
| Away at Work (>4 hrs) | 58°F – 60°F | 85°F (29°C) |
| Vacation / Empty | 55°F (13°C) Minimum | 88°F (31°C) |
| Fan Setting | Auto (10 min/hr cycle) | Auto (10 min/hr cycle) |
| Mini-Split Inverter | 70°F Steady (No drops) | 74°F Steady (No drops) |
Take a few minutes today to check your current thermostat schedule. Lock in your 68°F winter baseline or 78°F summer target based on the current season.
Adjust your setpoints in small one-degree increments over the coming week to pinpoint your family’s comfort zone. Add wireless room sensors or smart geofencing rules to stop conditioning empty living spaces.
Consistent temperature settings will lower your utility costs while keeping your home comfortable in every season.

2 thoughts on “The Complete Smart Guide to Every Thermostat Setting for Year-Round Energy Savings”