
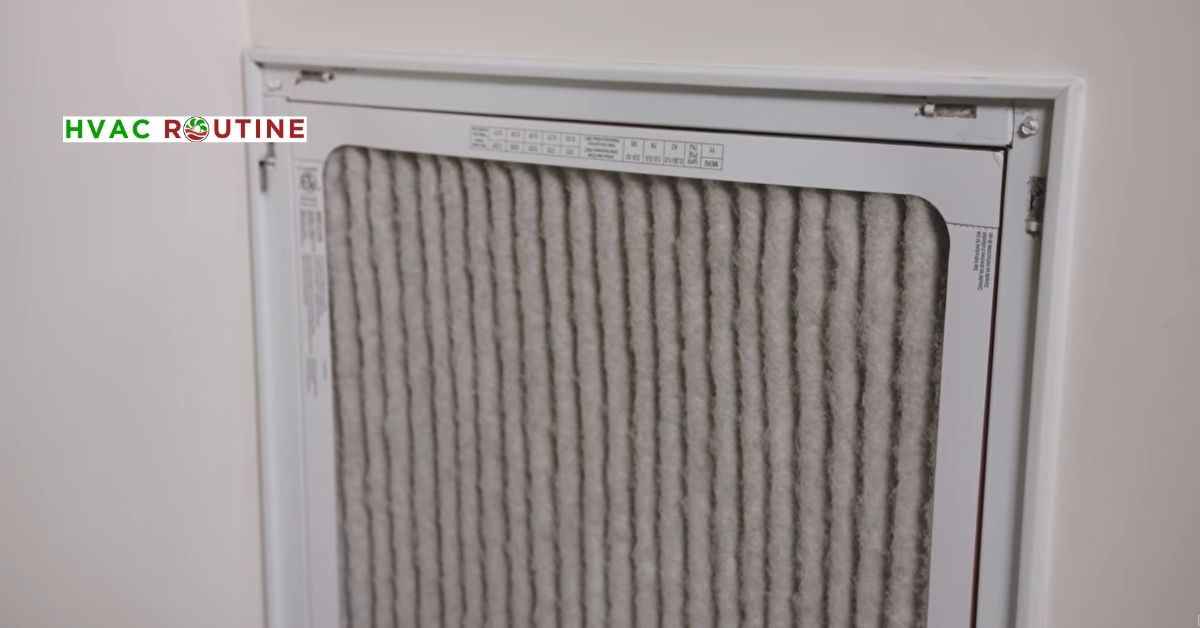
Nobody enjoys waking up with a scratchy throat during allergy season or opening an electric bill that jumped fifty dollars for no apparent reason. A clogged air filter forces your system blower to work twice as hard while recirculating dust and pet hair straight through your living room.
Learning how to replace HVAC filter units in your home takes under five minutes and cuts your monthly heating and cooling energy use by up to 15 percent, according to the U.S. Department of Energy.
I still remember standing in the home improvement aisle years ago, staring blankly at a massive wall of air filters and feeling completely lost by all the numbers and sizes. Once you learn a few basic tricks, this quick maintenance task saves you hundreds of dollars in avoidable repair bills and keeps your equipment running smoothly.
This guide walks you through the entire project step by step so you can handle it yourself today with total confidence.
What You'll Learn ⭐⭐⭐⭐⭐
- Project Snapshot: Tools, Safety, and Warning Signs
- Find Your HVAC Filter Box and Return Vents
- Select the Correct Replacement Filter
- How to Replace HVAC Filter Step-by-Step
- Avoid Common Filter Installation Mistakes
- Set a Regular Replacement Schedule
- Upgrade to a 4-Inch Media Cabinet
- Common Questions and Practical Answers
- Simple Habits for Clean Indoor Air
Project Snapshot: Tools, Safety, and Warning Signs
Tools and Supplies Required
- Replacement air filter matched to your exact system measurements.
- Permanent marker to write the installation date on the outer frame.
- Vacuum cleaner with a narrow hose brush attachment.
- Heavy-duty plastic trash bag for clean, dust-free disposal.
- Nitrile gloves and a dust mask.
Safety Warnings
- Turn off system power at the thermostat and the main furnace switch before you open any access panel.
- Keep your hands clear of sharp sheet metal edges, moving fan blades, and electrical wires.
- Wear a dust mask so you do not breathe in concentrated mold spores, dust mites, and pet dander.
- Never run your heating or cooling system without a clean filter in place.
When to Call a Pro
- Thick ice forms across your indoor cooling coil or outdoor copper refrigerant lines.
- You hear loud rattling, grinding, or whistling sounds coming from the air handler cabinet.
- Airflow stays weak across all supply vents even after you insert a fresh filter.
- You notice a distinct electrical burning odor near the furnace.
Find Your HVAC Filter Box and Return Vents
Finding the filter slot can feel like a mini treasure hunt if you just moved into a new home. Most central heating and cooling systems keep the filter inside a dedicated HVAC filter box. This narrow metal slot sits right between your return air duct and the main blower compartment.
Look for a slide-out latch, a hinged metal door, or a removable faceplate along that connection point.
Other homes place filters behind a wall or ceiling return air grille.
You can swing these grilles open easily by releasing two small thumb latches with your fingers. Multi-story homes often feature separate return grilles on each floor to balance air circulation. Never install filters in both the ceiling grille and the furnace cabinet at the same time.
Double filtration along a single duct line chokes airflow and builds excessive static pressure that burns out blower motors.
Select the Correct Replacement Filter
Standing in the filter aisle at the hardware store can feel overwhelming with dozens of sizes and numbers staring back at you. Check the printed text along the outer cardboard rim of your old filter before you leave the house. Manufacturers print nominal vs actual air filter dimensions right on the packaging.
For example, a nominal 16 × 25 × 1 inch filter actually measures 15.5 × 24.5 × 0.75 inches.
Always match the exact size printed on your current frame so unfiltered air does not leak around the edges.
Next, pick the right MERV rating for your household needs. The American Society of Heating, Refrigerating and Air-Conditioning Engineers rates filter efficiency on a 1-to-16 scale. Filters rated MERV 1 to 4 catch large lint clusters but let fine dust and pollen blow right through.
Filters rated MERV 8 to 11 hit the sweet spot for most homes by catching pet dander, mold spores, and pollen without restricting airflow. Filters rated MERV 13 and above capture microscopic smoke particles and bacteria. Check your equipment manual before buying a MERV 13 filter because dense pleats can strain older blower motors.
Skip the cheap, flat fiberglass panels and choose pleated cotton-polyester filters for solid protection and clean indoor air.
How to Replace HVAC Filter Step-by-Step
Grab your supplies and follow these straightforward steps to complete the job cleanly.
Step 1: Shut Down Power at the Thermostat and Switch
Switch your thermostat to the “Off” position. Flip the electrical service switch on the side of your furnace cabinet to cut power completely. This safety step stops the blower fan from suddenly kicking on and pulling loose dust into the ductwork while your hands are inside.
Step 2: Open the Access Door
Unlatch the cover on your HVAC filter box or drop the swing-down frame on your return wall grille.
Set the panel aside where you will not step on it.
Step 3: Spot the Airflow Arrow Direction
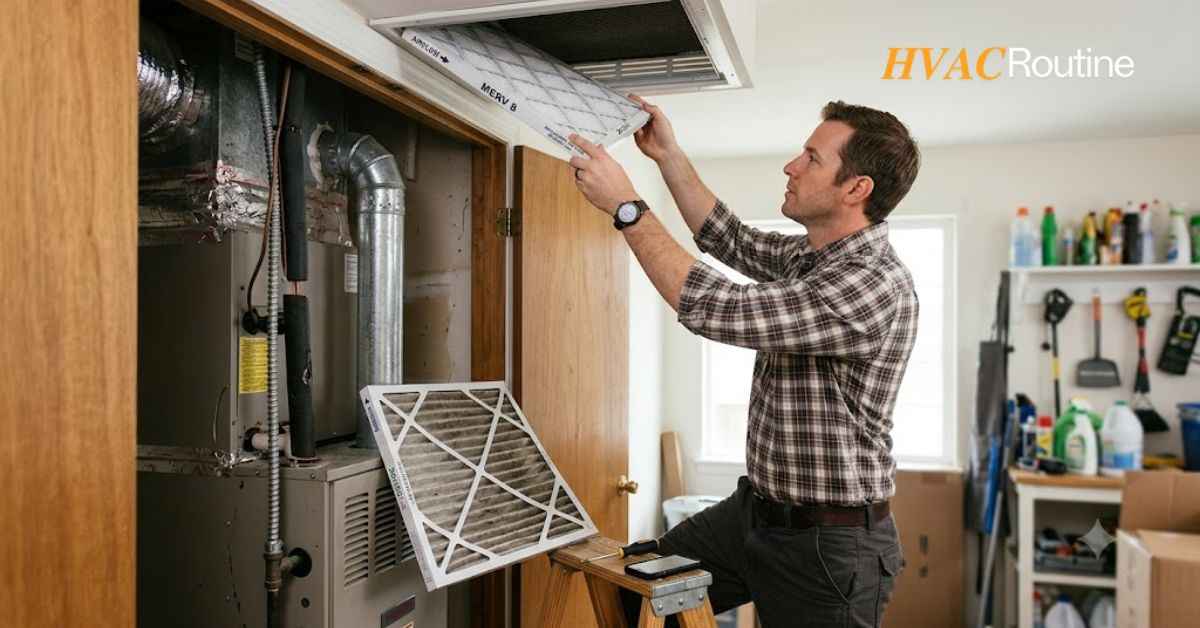
Look closely at the edge of the dirty filter before you pull it out. Locate the printed arrows that show the furnace filter airflow arrow direction. The arrows must point toward the blower motor and away from the return ductwork.
Snap a quick photo with your phone if you worry about forgetting which way it faces.
Step 4: Slide Out and Bag the Dirty Filter
Carefully pull the old filter straight out of its metal channel. Slide it directly into a plastic trash bag so you do not dump a cloud of dust across your floor.
Tie the bag shut and set it aside for the trash bin.
Step 5: Vacuum the Empty Housing Track
Attach the hose brush to your vacuum cleaner. Vacuum loose lint, pet fur, and dust balls from the metal tracks so the new frame slides in without snagging.
Step 6: Slide In the New Filter
Check that the airflow arrow points directly toward the blower compartment. Slide the filter smoothly into the channel until it rests firmly against the back stop.
Make sure the cardboard frame sits flat without bowing or warping.
Step 7: Use the Marker Trick and Restore Power
Grab a permanent marker and write today’s date directly on the white cardboard frame.
Trust me, you will not remember when you changed this filter three months from now, and this simple trick saves you from constant guessing.
Close the access door tightly and latch it shut. Flip the power switch back on and set your thermostat to your desired temperature.
Listen for smooth, quiet airflow without annoying whistling sounds.
Avoid Common Filter Installation Mistakes
I have seen small DIY oversights turn into four-figure HVAC repair bills.
Pay attention to these common traps to protect your equipment.
- Installing the Filter Backward: Installing a filter against the airflow bends the wire backing and forces trapped dirt straight into the blower fan. I once helped a neighbor thaw out an evaporator coil that froze into a solid block of ice simply because the filter sat backward for three months.
- Leaving Air Bypass Gaps: An undersized filter leaves open gaps that let dirty air coat your wet cooling coils in sticky grime.
- Stacking Two Thin Filters: Shoving two 1-inch filters into a 2-inch slot cuts airflow in half, overheats the heat exchanger, and triggers safety shutoffs.
- Relying on Visual Memory: Skipping the marker trick leads to forgotten filters that silently choke your system all season long.
Set a Regular Replacement Schedule
How often do you really need to know how to replace HVAC filter media in your home?
Your ideal schedule depends entirely on your daily household lifestyle.
- Vacation homes or single occupants: Check and change every 6 to 12 months.
- Standard suburban homes without pets: Replace your filter every 90 days.
- Homes with a dog or cat: Swap filters every 60 days to keep shedding fur under control.
- Homes with multiple pets or active allergy sufferers: Replace every 30 to 45 days during peak seasons.
Hold your filter up to a bright flashlight every month.
If light cannot pass through the pleats, swap it out right away.
Upgrade to a 4-Inch Media Cabinet
Standard 1-inch filter slots work fine, but a 4-inch deep-pleated media box delivers superior performance. A 4-inch media filter provides up to six times more surface area than a standard 1-inch filter.
More surface area means the media catches tons of dust while letting air flow freely with minimal resistance. You only need to replace a 4-inch media filter once or twice a year.
Ask your HVAC technician about adding a dedicated media housing to your return duct during your next seasonal service visit.
Common Questions and Practical Answers
Which way does the arrow point on a ceiling return grille?
The airflow arrow must point upward toward the ductwork in the ceiling.
Air in the room travels up into the vent, so the arrow follows that upward path toward the equipment.
Can you vacuum a disposable pleated filter to reuse it?
Never vacuum and reuse a disposable pleated filter.
Vacuuming ruins the microscopic synthetic fibers and opens gaps that let fine allergens pass right through.
Always replace dirty disposable filters with fresh replacements.
What happens if you run your system without a filter?
Running your unit without a filter pulls airborne dust and pet hair directly onto your wet evaporator coil.
The grime forms a thick sludge that blocks heat exchange, causes coil freeze-ups, and leads to expensive repair bills.
Simple Habits for Clean Indoor Air
Regular filter maintenance keeps your heating and cooling equipment running smoothly throughout the year.
Buy a multi-pack of your home’s correct filter size so you always have a spare ready in your utility closet. Set a recurring calendar alert on your phone for the first day of every season.
Taking five minutes to complete this simple task protects your equipment, lowers your utility bills, and keeps your family breathing clean, fresh air.

1 thought on “How to Replace HVAC Filter: A Practical Step-by-Step Guide”