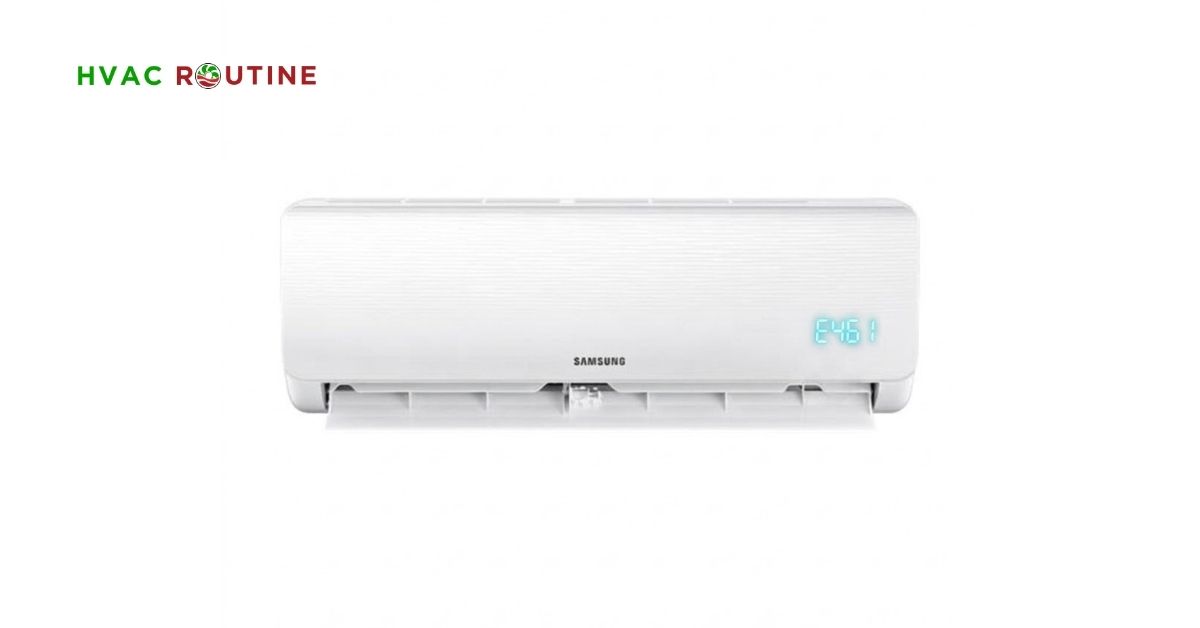
Seeing your air conditioner stop working right in the middle of summer feels incredibly frustrating. You are sitting there sweating in a hot house, only to walk over to the wall unit and notice the Samsung E461 error code flashing on the digital display. Let’s be honest, this is the last thing you want to deal with.
This specific alert tells you that the outdoor compressor completely failed to start. Sometimes, you might also see the Samsung E464 error code instead, which means the compressor started but pulled way too much electrical current. Both of these alerts point directly to the outdoor unit and its heavy-duty power supply. You cannot just press a reset button to make these electrical faults disappear. Fixing these problems requires methodical testing of high-voltage parts.
Tools Required:
You need specific tools to test the system safely and accurately.
- Digital multimeter with Diode Mode for checking electrical continuity.
- CAT III 600V rating on your multimeter to safely handle high-voltage spikes.
- Amp clamp meter to measure the locked rotor amp draw.
- Insulated screwdriver set to remove panels safely.
- Safety gloves and safety glasses to protect your hands and eyes.
- Coil cleaning jet wash for clearing out blocked condenser fins.
Safety Warnings:
High voltage can cause severe injury or death, so please take this seriously.
- Turn off all mains power at the main breaker panel before opening the outdoor unit.
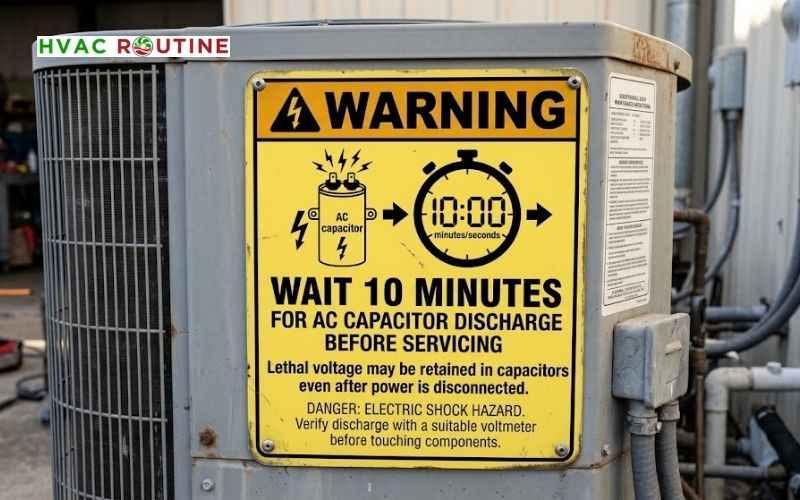
- Wait a minimum of 10 minutes after disconnecting the power. This waiting period allows the high-voltage DC capacitors on the inverter PCB to discharge their stored energy.
- Never touch the U, V, and W compressor terminals while the system has power.
Step-by-Step Fixes:
Follow a strict order of operations to find the broken part without wasting time.
- Check the outdoor condenser coil and fan motor for simple airflow blockages.
- Perform a visual inspection on the circuit board for burn marks and pests.
- Test the compressor winding resistance with your multimeter.
- Perform an inverter PCB diode test on the main control board.
- Measure the electrical current during startup to check for mechanical jams.
When to Call a Pro:
Some repairs simply require professional training and specialized equipment. Hire a licensed HVAC technician if you lack experience handling 240-volt electrical systems. You also need a professional if the system requires refrigerant recovery, or if the printed circuit board needs component-level micro-soldering.
What You'll Learn ⭐⭐⭐⭐⭐
- Understanding Samsung E461 Error Code and Compressor Faults
- What Causes the E461 “Fail to Start” Message?
- Why the E464 IPM Overcurrent Triggers Instantly
- Differentiating Between Startup Failure and Running Overcurrent
- Reading LED Blinking Patterns on Older Units
- Preparing the Outdoor Unit for Diagnostics
- Verifying Power Disconnect and Capacitor Discharge
- Accessing the Inverter PCB and Compressor Wiring Harness
- The Samsung E461 Error Code Diagnostic Workflow
- Phase 1: Checking the Condenser Coil and Fan Motor
- Phase 2: Performing a Visual Inspection of the Inverter Board
- Phase 3: Testing Compressor Winding Resistance
- Phase 4: Performing a PCB Diode Test on the IPM
- Phase 5: Identifying a Mechanically Locked Rotor
- Expert Insights on Samsung HVAC Troubleshooting
- Identifying Refrigerant Overcharge Issues
- Choosing Between Full PCB Replacement and Micro-Soldering
- Installing Voltage Stabilizers to Protect the Inverter Board
- Questions Homeowners Ask About Compressor Faults
- Will Resetting the Breaker Clear a Permanent E464 Code?
- Waiting Out the Three-Minute Compressor Time Delay
- Can Technicians Test the Compressor Without Unplugging It?
- Repair Costs for Samsung E461 and E464 Faults
- Checking Your Factory Warranty Status
- Sourcing the Right OEM Replacement Parts
- Key Takeaways for Restoring Your Samsung AC
Understanding Samsung E461 Error Code and Compressor Faults
Modern inverter air conditioners use complex electronics to control cooling speeds. These parts break down under high heat or heavy electrical stress over time.
What Causes the E461 “Fail to Start” Message?
The E461 alert means the compressor receives a signal to spin but cannot physically turn. A broken wire inside the main harness often causes this fail to start compressor issue. Alternatively, a completely burned-out compressor winding will trigger this exact same message. Sometimes, a severe inverter PCB failure prevents the board from sending power to the compressor entirely.
Why the E464 IPM Overcurrent Triggers Instantly
Here is where things get a bit more technical. The E464 alert happens when the compressor successfully starts but pulls a dangerously high amount of electrical current. The Intelligent Power Module (IPM) on the circuit board monitors this power draw constantly. The IPM instantly shuts the entire system down when it detects an IPM overcurrent fault. This rapid shutdown acts as a safety shield, preventing the chip from burning out or the compressor windings from melting into a puddle.
Differentiating Between Startup Failure and Running Overcurrent
You need to know the exact difference between these two faults to save time. The Samsung E461 error code represents a complete failure to initiate the spinning process. On the other hand, the Samsung AC error E464 represents a mechanical or electrical overload during the actual operation. Think of E461 like a car with a dead starter, while E464 resembles a car trying to drive with the parking brake fully engaged.
Reading LED Blinking Patterns on Older Units
Some older or basic Samsung models lack a digital screen to display the exact text of an error code. Instead, you have to watch the small LED indicator lights flashing directly on the outdoor inverter board. Count exactly how many times the red, green, and yellow lights flash in a sequence. You can then match this specific blinking pattern to the diagnostic table printed on the inside of the electrical cover panel. This chart will tell you if that sequence translates to an E461 or an E464 fault.
Preparing the Outdoor Unit for Diagnostics
You must secure the outdoor unit before you touch any internal wires. Skipping this step is extremely dangerous.
Verifying Power Disconnect and Capacitor Discharge
Locate your main electrical panel and flip the breaker for the AC unit to the off position. Set a timer on your phone for 10 minutes and just step away. Those large cylindrical capacitors hold enough power to shock you even after you cut the mains. Once the time is up, use your multimeter to verify zero voltage across the main incoming power lines.
Accessing the Inverter PCB and Compressor Wiring Harness
Remove the screws holding the metal access panel on the outdoor condenser unit. Look for the thick wires running directly from the main circuit board down to the compressor. Samsung typically uses red, blue, and yellow wires for these connections. Follow these wires up to the board and locate the plugs labeled U, V, and W.
The Samsung E461 Error Code Diagnostic Workflow
You can track down the exact broken component by following a logical testing path. Do not skip straight to the expensive parts.
Phase 1: Checking the Condenser Coil and Fan Motor
Start with the simplest mechanical checks before testing the electronics. A heavily soiled outdoor coil traps massive amounts of heat inside the unit, and a dead outdoor fan motor creates this exact same suffocation effect. Trapped heat spikes the internal refrigerant pressure and forces the compressor to work much harder. This excess workload forces the system to pull massive amps and triggers an overcurrent shutdown.
Phase 2: Performing a Visual Inspection of the Inverter Board
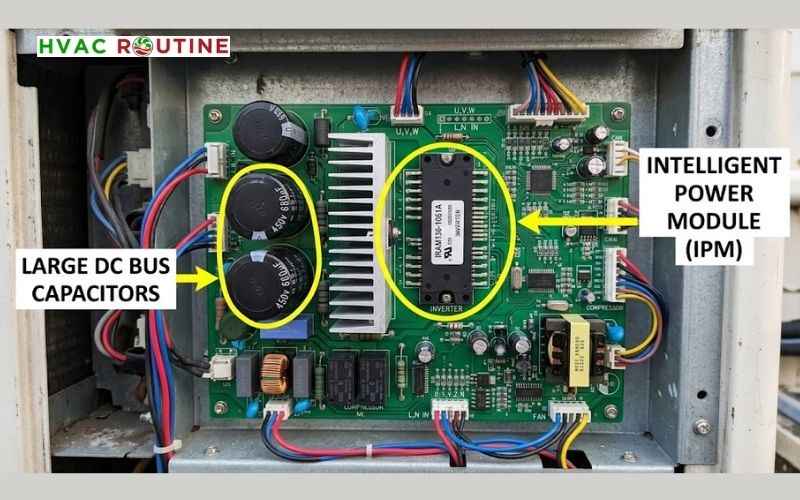
Always inspect the physical condition of the circuit board before touching it with your multimeter probes. Look closely for swollen capacitors that look like they are popping open at the top, and scan the area around the IPM chip for dark black burn marks. Geckos, bugs, and mice often crawl behind the warm panel and cause immediate short circuits across the high-voltage traces. Finding a fried lizard on the PCB instantly tells you exactly why the board stopped sending power to the compressor.
Phase 3: Testing Compressor Winding Resistance
Now you need to verify the internal health of the compressor motor. Unplug the U, V, and W wires from the circuit board and set your digital multimeter to the Ohms setting. Place your probes on the actual wire connectors to measure the resistance between the distinct phases.
Expected Ohms Readings for U, V, and W Terminals
Test the resistance across the U to V terminals, the V to W terminals, and the W to U terminals. All three of these readings must match perfectly. A healthy compressor usually shows readings somewhere between 1.5 Ohms to 3.0 Ohms for each pair. The compressor requires a full replacement if any reading shows an open line (OL) or drops to absolute zero.
Phase 4: Performing a PCB Diode Test on the IPM
The large microchip attached to the aluminum heatsink controls the power delivery. Set your multimeter to Diode Mode to check this chip for internal electrical shorts. Place your red probe on the negative DC capacitor terminal and touch your black probe to the U, V, and W pins. Reverse the process by putting the black probe on the positive capacitor terminal and testing the pins with the red probe. Consistent voltage drop readings indicate a healthy board, while a zero reading confirms a blown microchip.
Phase 5: Identifying a Mechanically Locked Rotor
Sometimes the electrical windings and the circuit board test perfectly fine, leaving you scratching your head. You might restart the system and watch it pull a massive amount of power for about two seconds before dying. HVAC technicians call this severe mechanical jam a locked rotor amp draw. The internal mechanical pump seizes up completely and requires a full compressor replacement.
Expert Insights on Samsung HVAC Troubleshooting
Professional technicians see specific patterns when dealing with these complex inverter systems. Let’s look at what the experts know.
Identifying Refrigerant Overcharge Issues
Untrained handymen sometimes top up an air conditioner without using a digital refrigerant weighing scale. Adding too much refrigerant causes a serious problem known as liquid slugging. The excess refrigerant causes the internal head pressure to skyrocket rapidly. This extreme pressure forces the compressor to stall and directly causes overcurrent faults.
Choosing Between Full PCB Replacement and Micro-Soldering
Let’s be honest, nobody wants to pay for a brand new circuit board if they do not have to. Official Samsung service centers strictly mandate replacing the entire circuit board when a component fails, which costs a significant amount of money. Advanced electronics repair shops offer an alternative solution. These experts can desolder the blown IPM chip from your existing board and install a new one for a fraction of the price.
Installing Voltage Stabilizers to Protect the Inverter Board
Poor grid voltage damages sensitive inverter components slowly over months or years. Spikes and voltage drops force the circuit board to compensate and overheat continuously. Installing a high-quality voltage stabilizer protects the board from dirty municipal power. This simple addition prevents future board failures and extends the life of the entire machine.
Questions Homeowners Ask About Compressor Faults
You probably have specific questions about handling these high-voltage alerts safely. Here are detailed answers based on real electrical engineering principles.
Will Resetting the Breaker Clear a Permanent E464 Code?
Flipping the breaker only fixes temporary software glitches caused by a random power surge in your neighborhood. A hard fault, like a shorted winding or a blown IPM chip, physically breaks the circuit. The system runs a self-diagnostic check the moment you turn the power back on, so the E464 error returns immediately if a part remains broken. For example, a burned wire cannot fix itself just because you restarted the machine.
Waiting Out the Three-Minute Compressor Time Delay
Remember that modern air conditioners feature a built-in safety timer to protect the internal mechanical parts. The compressor needs three to five minutes to balance the internal refrigerant pressures after you restore electrical power. You must wait out this complete delay before assuming the system remains broken. The unit will sit completely silent during this countdown phase, and many homeowners think their repair failed simply because they did not give the machine enough time to start up.
Can Technicians Test the Compressor Without Unplugging It?
Technicians absolutely cannot test the compressor while the wires remain connected to the main board. Leaving the harness plugged in creates a closed electrical loop with the printed circuit board. As a result, your multimeter will read the board’s internal resistance instead of the compressor’s true resistance. Isolating the wiring harness guarantees you get an accurate reading directly from the motor windings.
Repair Costs for Samsung E461 and E464 Faults
You have a few different options when dealing with a dead inverter board or a seized compressor. Local repair shops can save you money, while official Samsung parts guarantee longevity. Review these estimated repair costs to make the best financial decision for your cooling system.
| Repair Type | Estimated Cost (USD) | Reliability |
| Inverter PCB Micro-Soldering | $80 – $150 | Moderate |
| New OEM PCB Installation | $200 – $350 | Long-lasting |
| Full Compressor Replacement | $500 – $900+ | Long-lasting |
Checking Your Factory Warranty Status
Attempting a DIY repair or hiring an uncertified local technician instantly voids your official Samsung warranty. Call the factory service center first if your unit is less than ten years old, as the compressor itself usually carries a long-term guarantee straight from the manufacturer. Opening the electrical box yourself leaves tool marks on the screws that factory inspectors look for when approving claims.
Sourcing the Right OEM Replacement Parts
You must find the exact Original Equipment Manufacturer (OEM) part number if you decide to buy a brand new circuit board. Technicians locate this long alphanumeric code printed on a white barcode sticker directly on the old PCB. Matching the model number of the outdoor unit is never enough. Manufacturers update board revisions constantly throughout the production year, so you need the exact match for your specific machine.
Key Takeaways for Restoring Your Samsung AC
Dealing with a Samsung E461 error code demands patience and careful electrical testing. You must prioritize your safety by discharging the high-voltage DC components before starting any work. Keep the outdoor coil clean to prevent overheating and high-pressure lockouts, and remember that testing the compressor winding resistance gives you a clear picture of the motor’s internal health. Methodical testing stops you from wasting money on expensive parts you do not actually need.